Space Corp: First Play (Part Two)

The board at the beginning of turn six.

Turns 6-10

Dynamic Synergistics began an attempt to establish itself as a monopsony in the market for space equipment, purchasing Construction Rovers, Solid Nuclear Drives, and Chemical Drives. (Offer 1, 2, 3 profit on yellow). The market moved from exploration to construction, as a Heavy Lifter (Move 2 Build 2) and two Processors (Produce 1 Build 2) entered the market. Meanwhile, on Solar Lagrange Point 2, a team of SpaceCorp engineers constructed a spaceport out of a discarded cargo pod and service survey module to enable exploration of Mars and the asteroid belt. SpaceCorp R&D developed advance Salvage techniques, which could increase profitability. (Draw Salvage Card, P1 Edge: +1 Profit, take all “Start” cards from offer set).

Dynamic Synergistics continued its buying spree, this time snapping up all available processors. (Offers 1, 3, +2 Profit). The market shifted its focus to Solid Nuclear Drives and Excavators. SpaceCorp upgraded its infrastructure, deploying Solid Nuclear Drives to allow for teams to travel from the Solar Lagrange Point 2 Spaceport, dubbed Tosche Station, to Mars. The engineering team remaining on earth relocated to Tosche Station, no doubt to pick up some power converters, and they brought along a new survey module. (Draw Survey Module Explore 1, Build 1, upgrade).

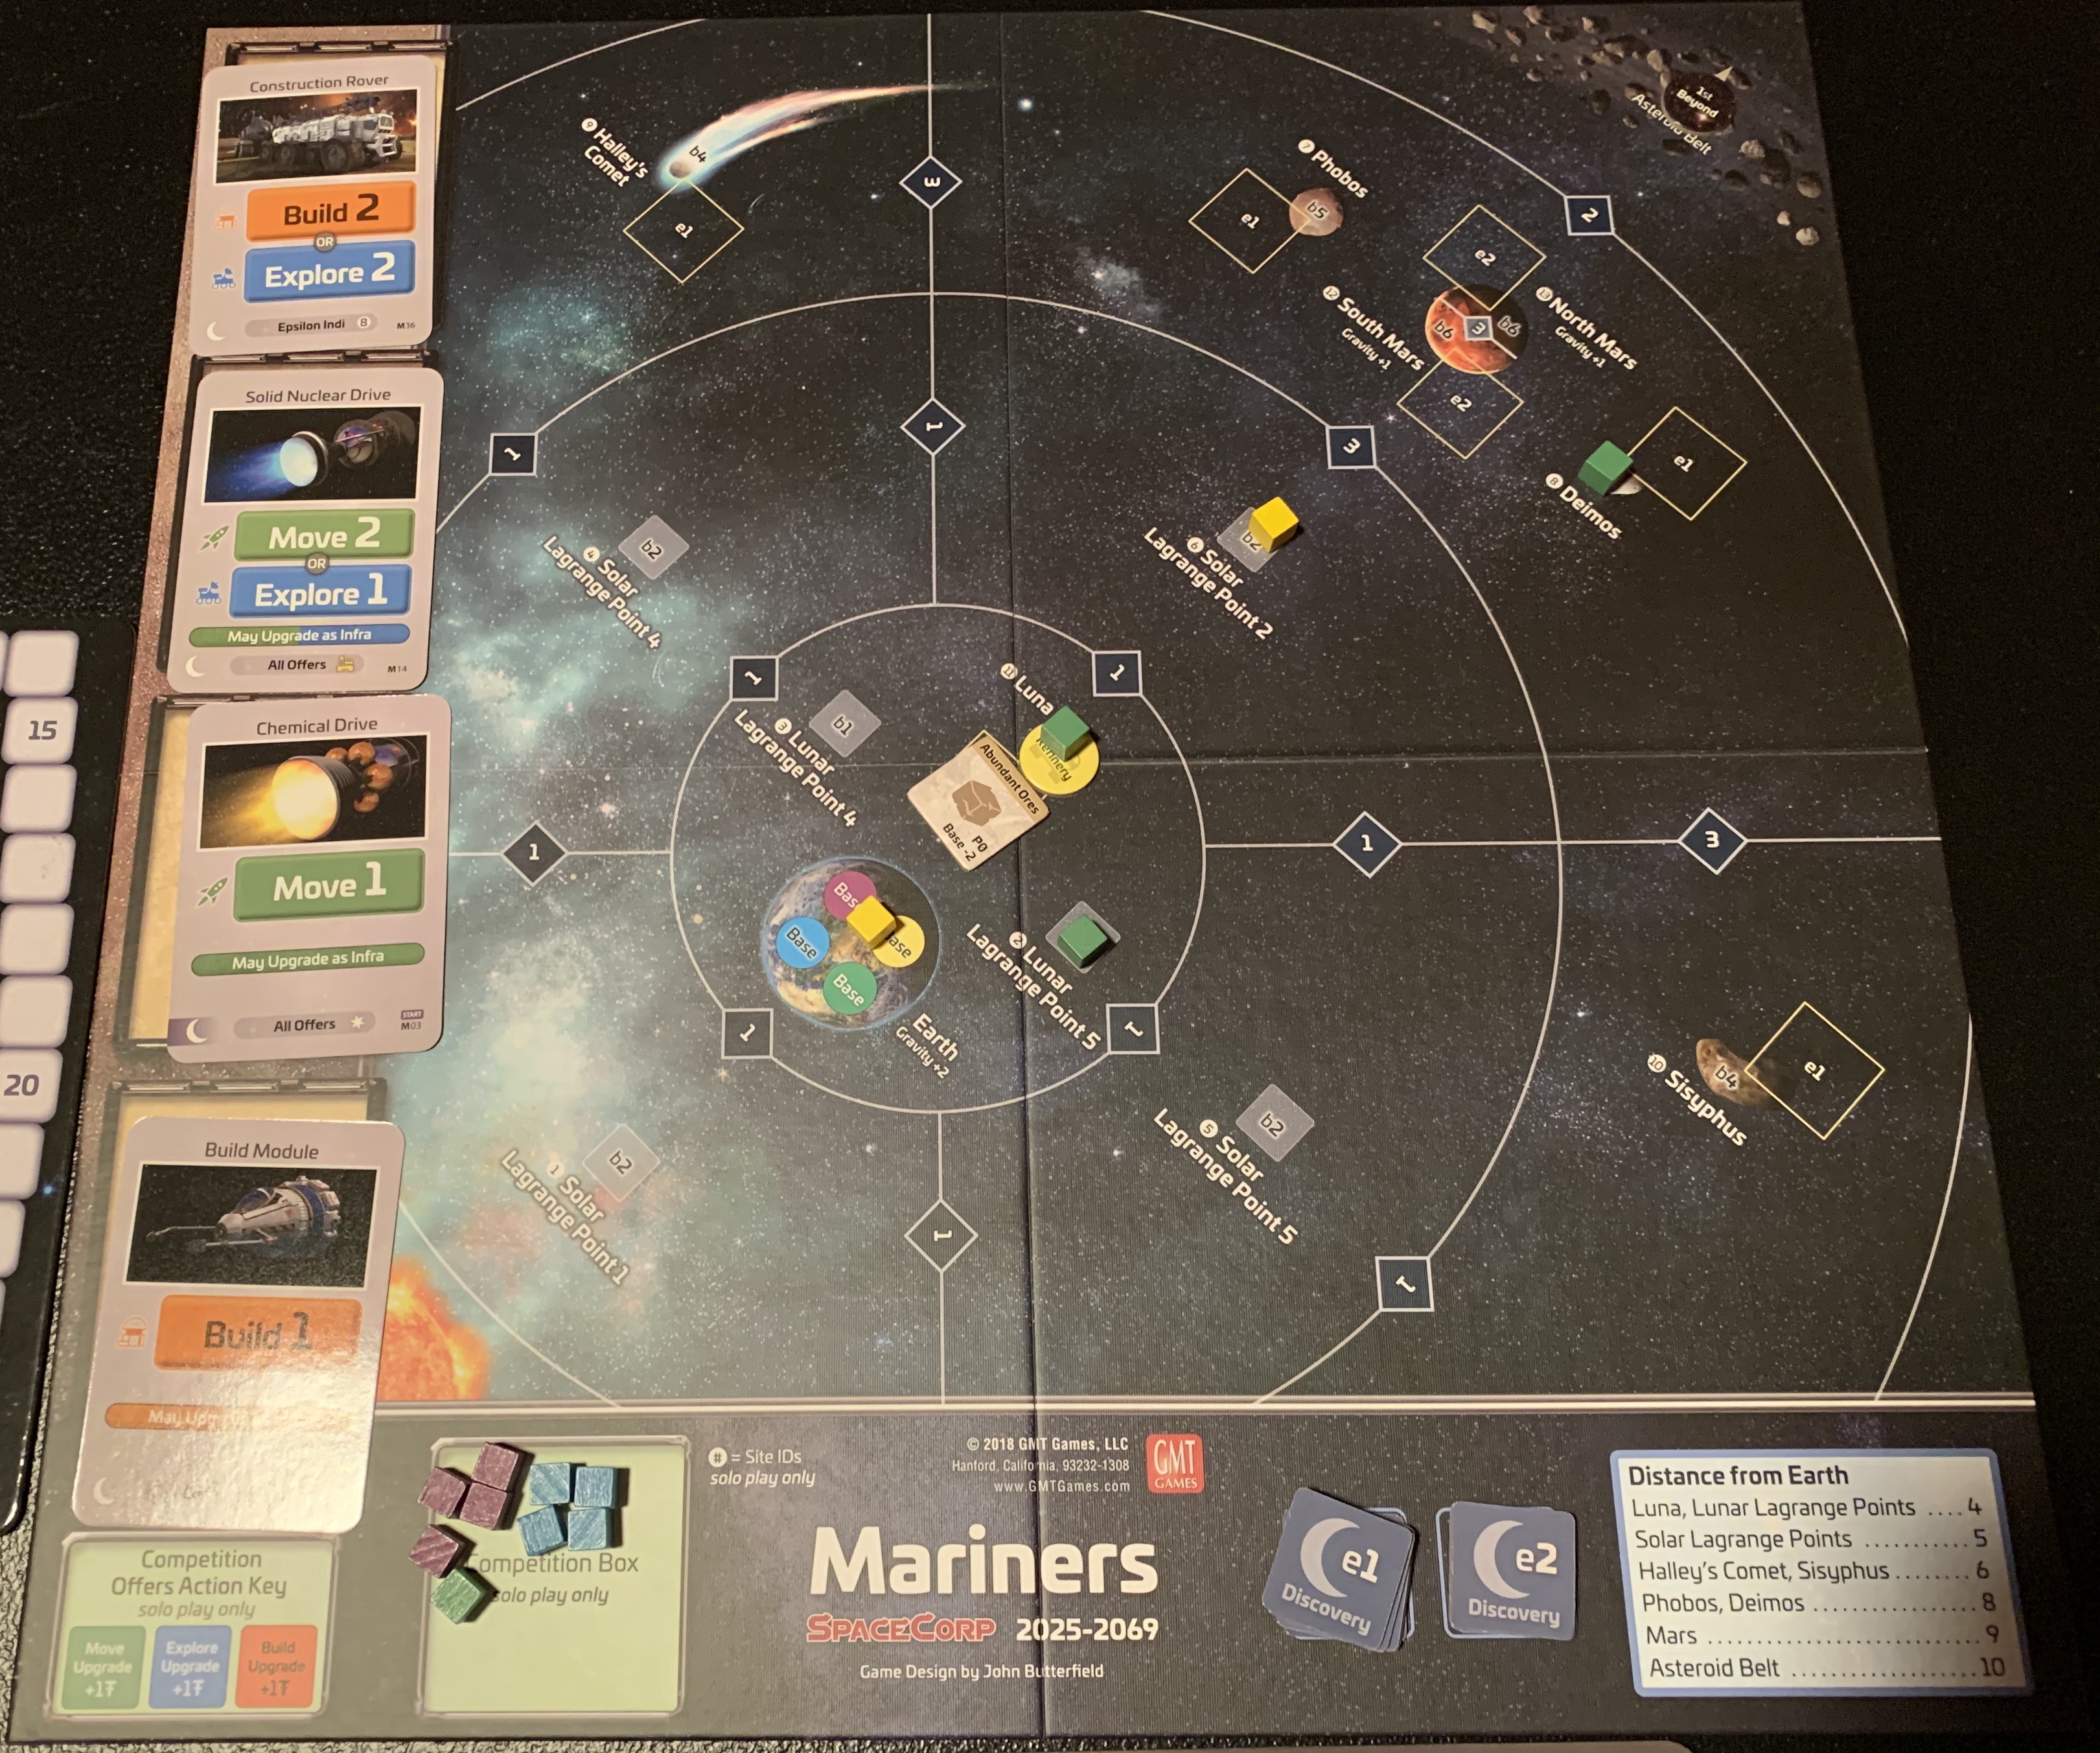
The China National Space Administration (CNSA) continued its efforts to explore Deimos, locating available water and constructing an industrial base on the moon. (+1 Profit). The CNSA then sent an additional team from Deimos to North Mars, hoping to beat SpaceCorp to the punch in establishing a Mars base. SpaceCorp sent its own team of engineers from Tosche Station to South Mars, planning to race the CNSA. SpaceCorp acquired a heavy lifter to assist in its construction efforts.

Dynamic Synergistics cannot be stopped in its efforts to purchase space-related technologies, even if it has yet to launch a successful craft. They purchased the Solid Nuclear Drive, Excavators, and Build Modules available on the market, and raked in a tidy profit reselling them to other companies. (Offers 1, 2, 4, +2 profit). The market for space related goods shifted from exploration to research, as two Genome Accelerators (Research 2, Genetics 1) entered the market. SpaceCorp continued its plans to explore South Mars by investing in upgrading its infrastructure with survey modules. Planning to exploit resources on Mars, SpaceCorp Acquisitions purchased a Core Driller (Produce 1, Explore 2).

The CNSA was still pushing to compete with SpaceCorp, and moved its own team of Engineers to South Mars, hoping to discover and exploit any resources there before SpaceCorp could find them. Unfortunately for the CNSA, SpaceCorp launched an exploratory mission on Mars’s Southern Hemisphere, and identified Exotic Elements, which both provided immediate profit (+2) and promised to be productive in the future (P1). Bases would be more expensive here, however, as exotic elements proved to be a radiation hazard. SpaceCorp’s team started laying the ground work for a base on the tile, while SpaceCorp Acquisitions purchased another Core Driller, hoping to exploit the Martian elements.

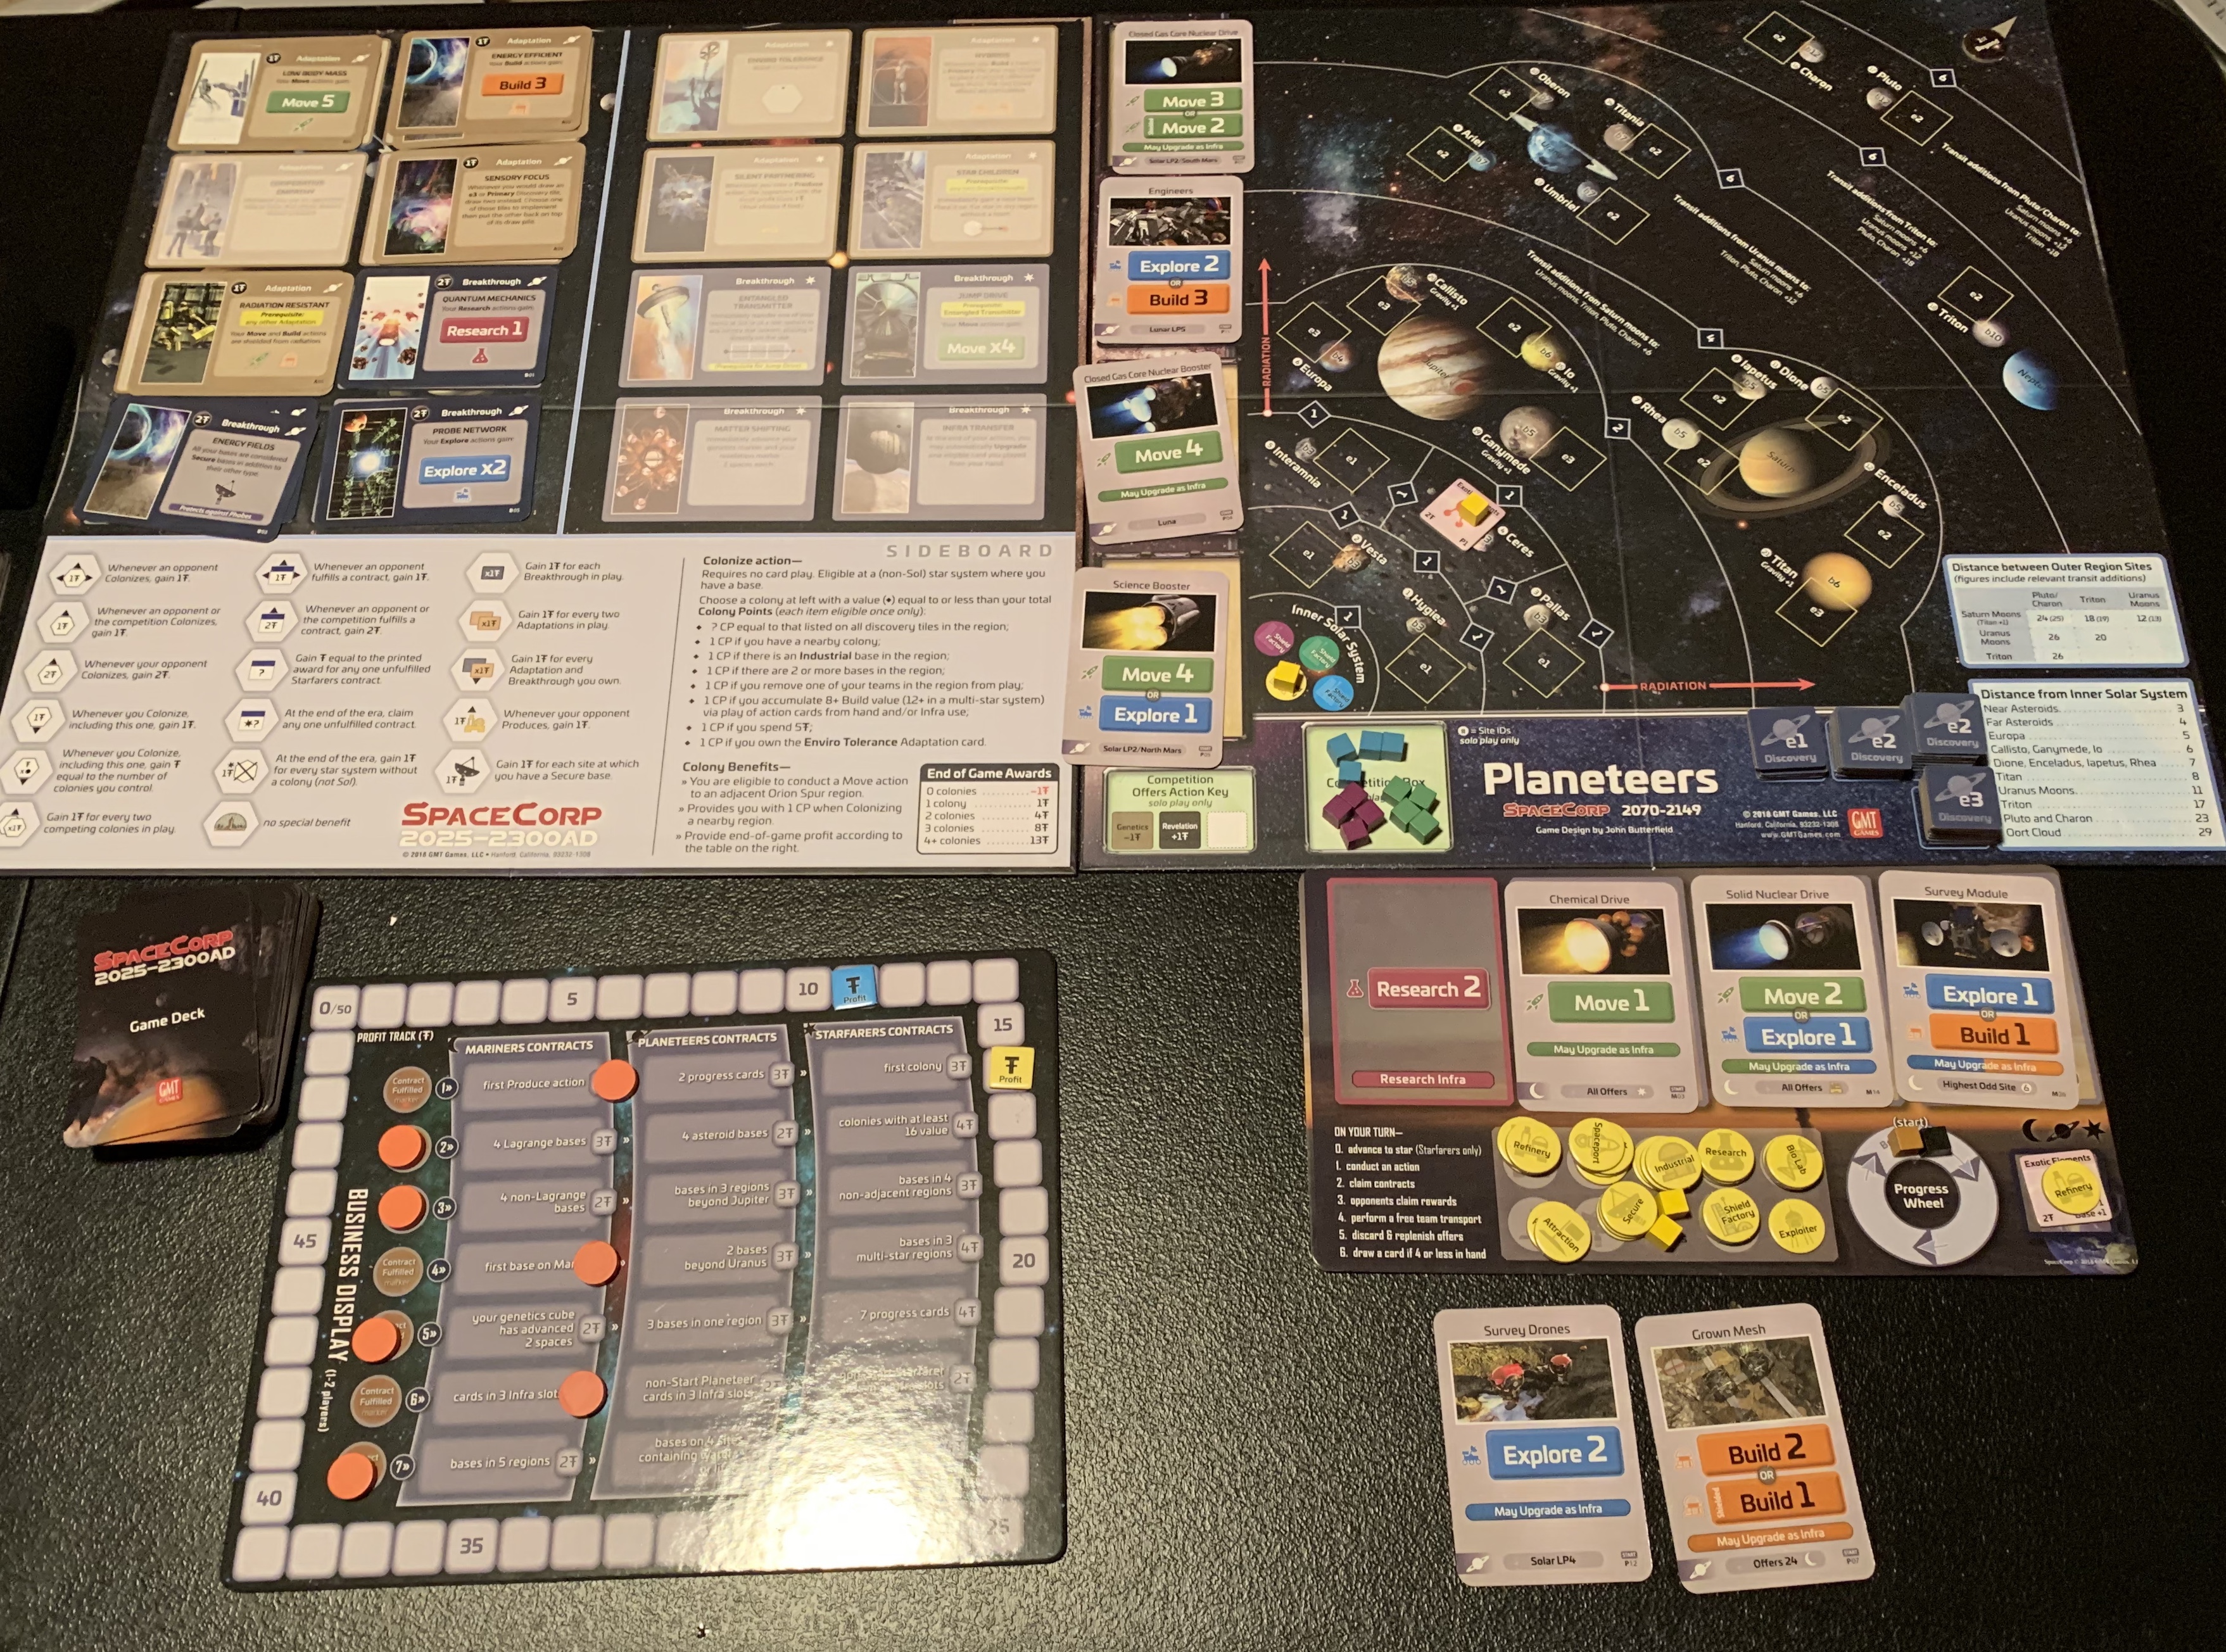
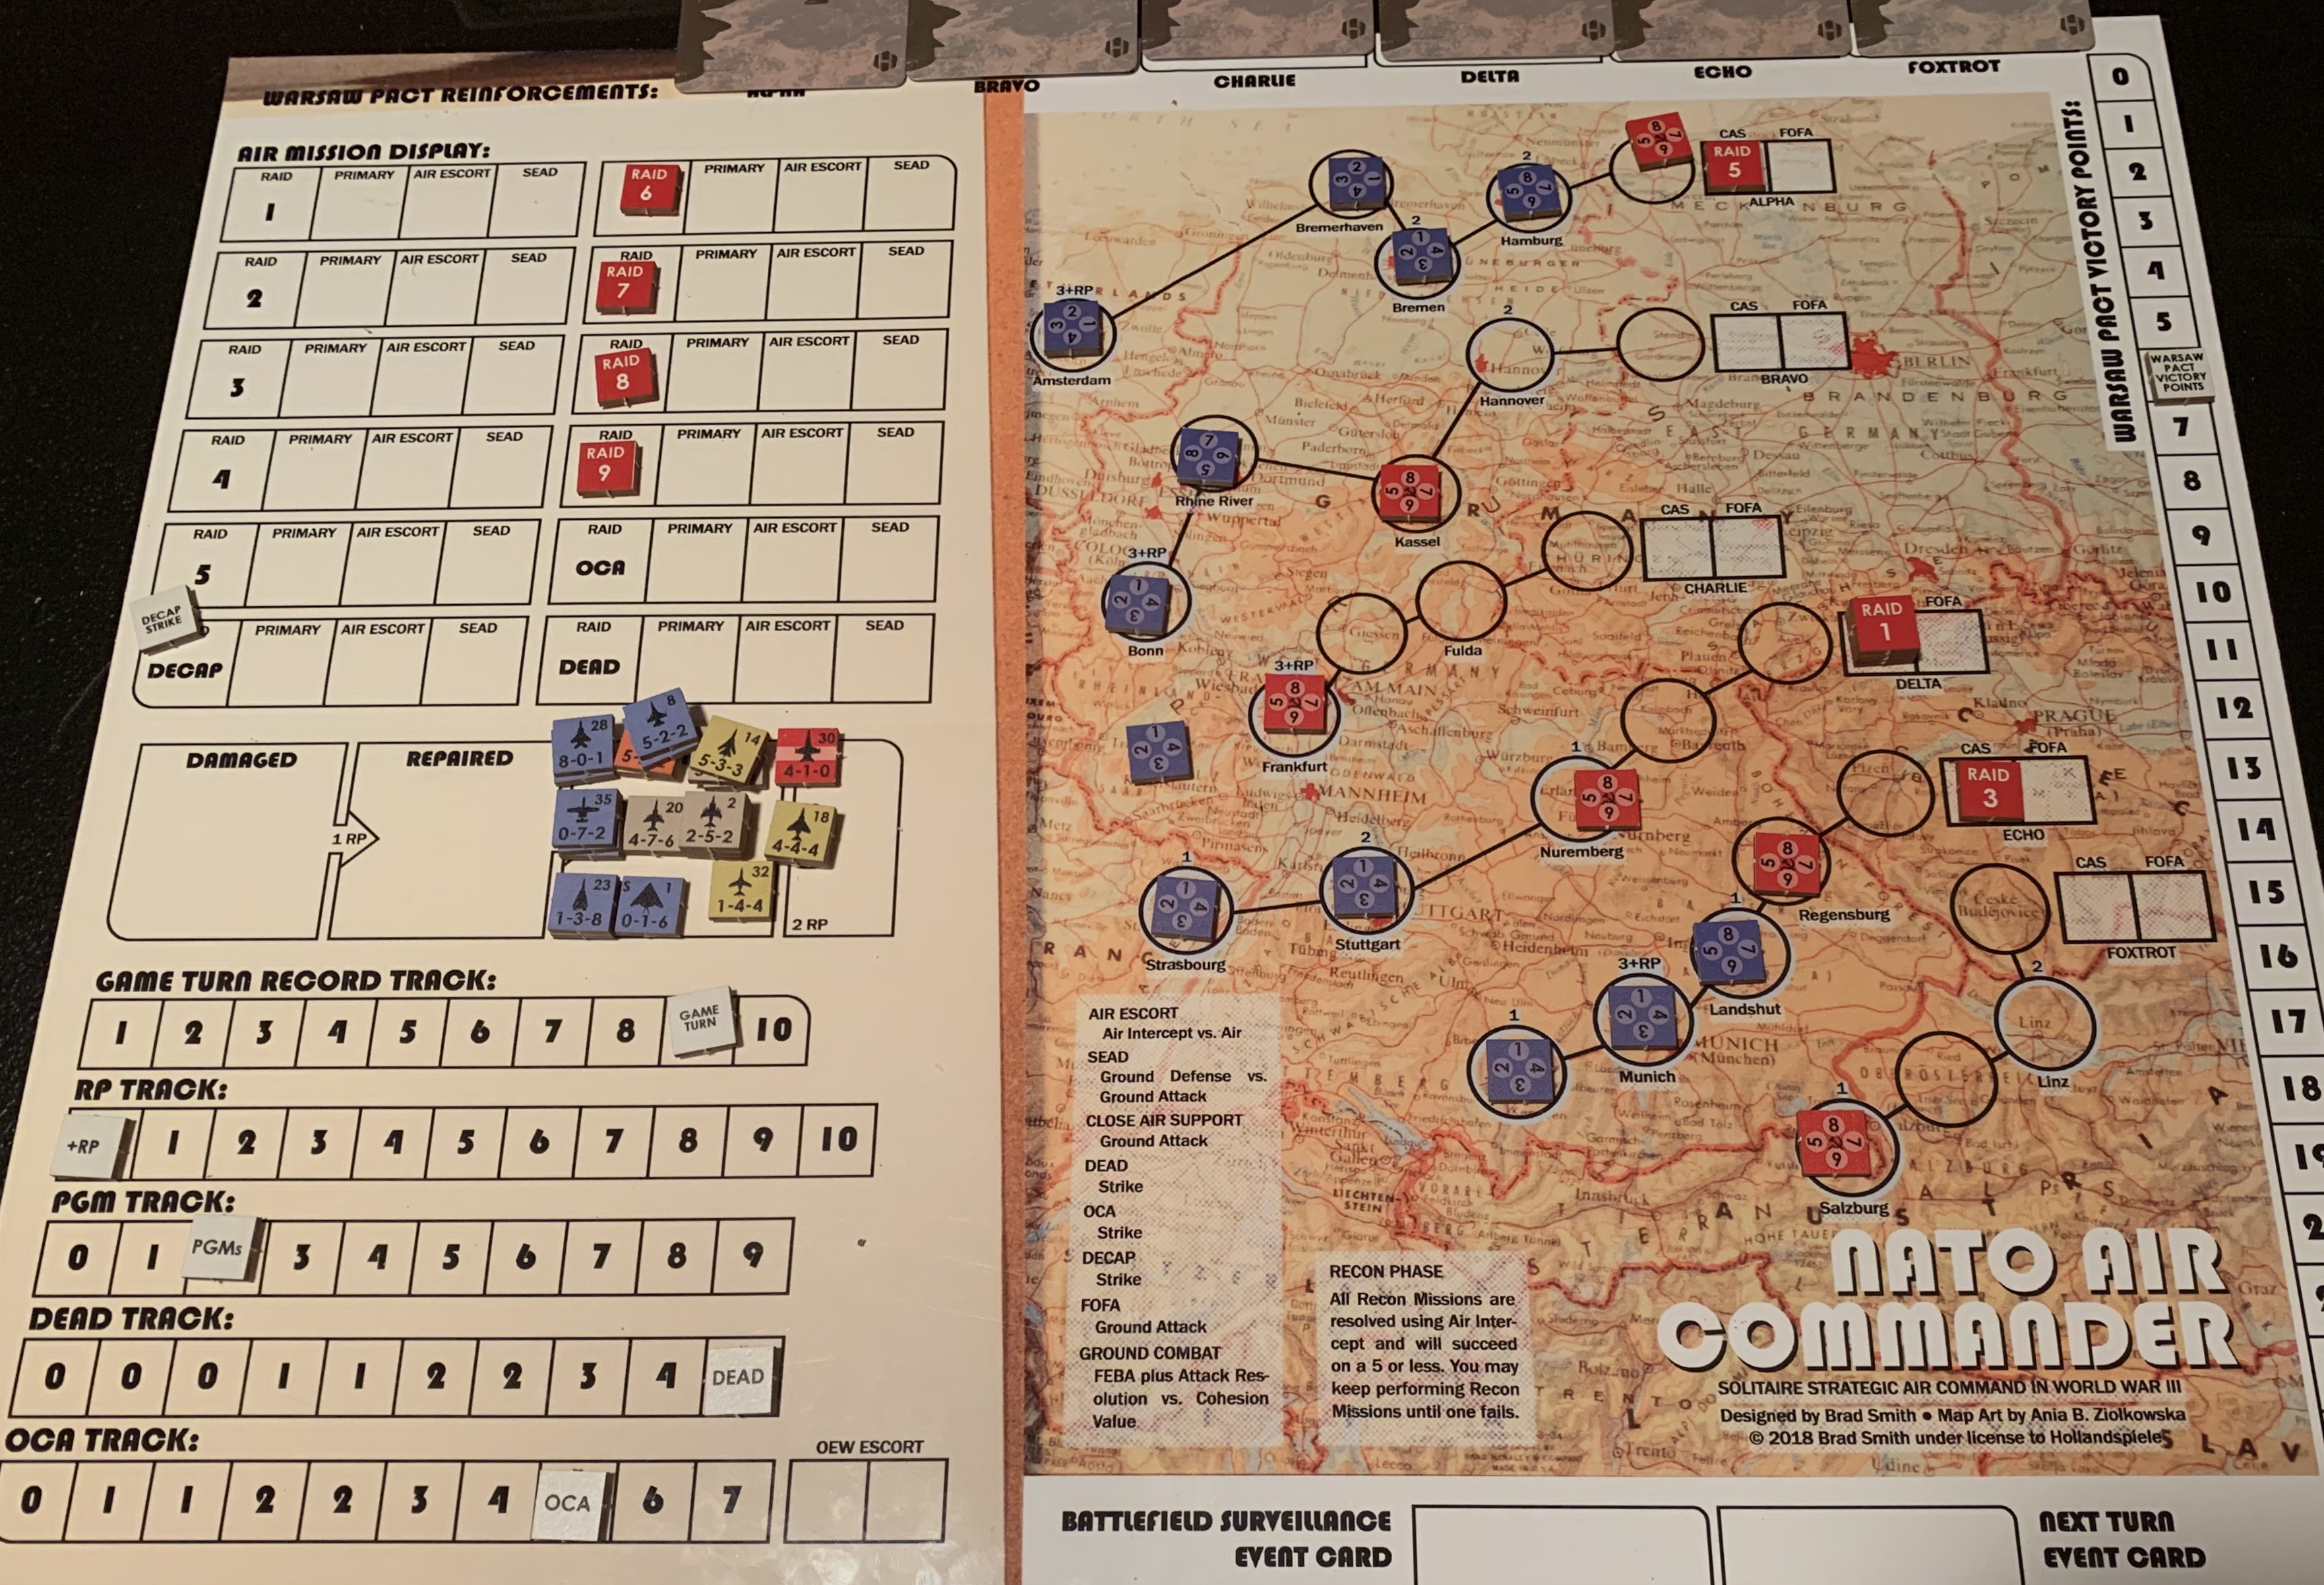
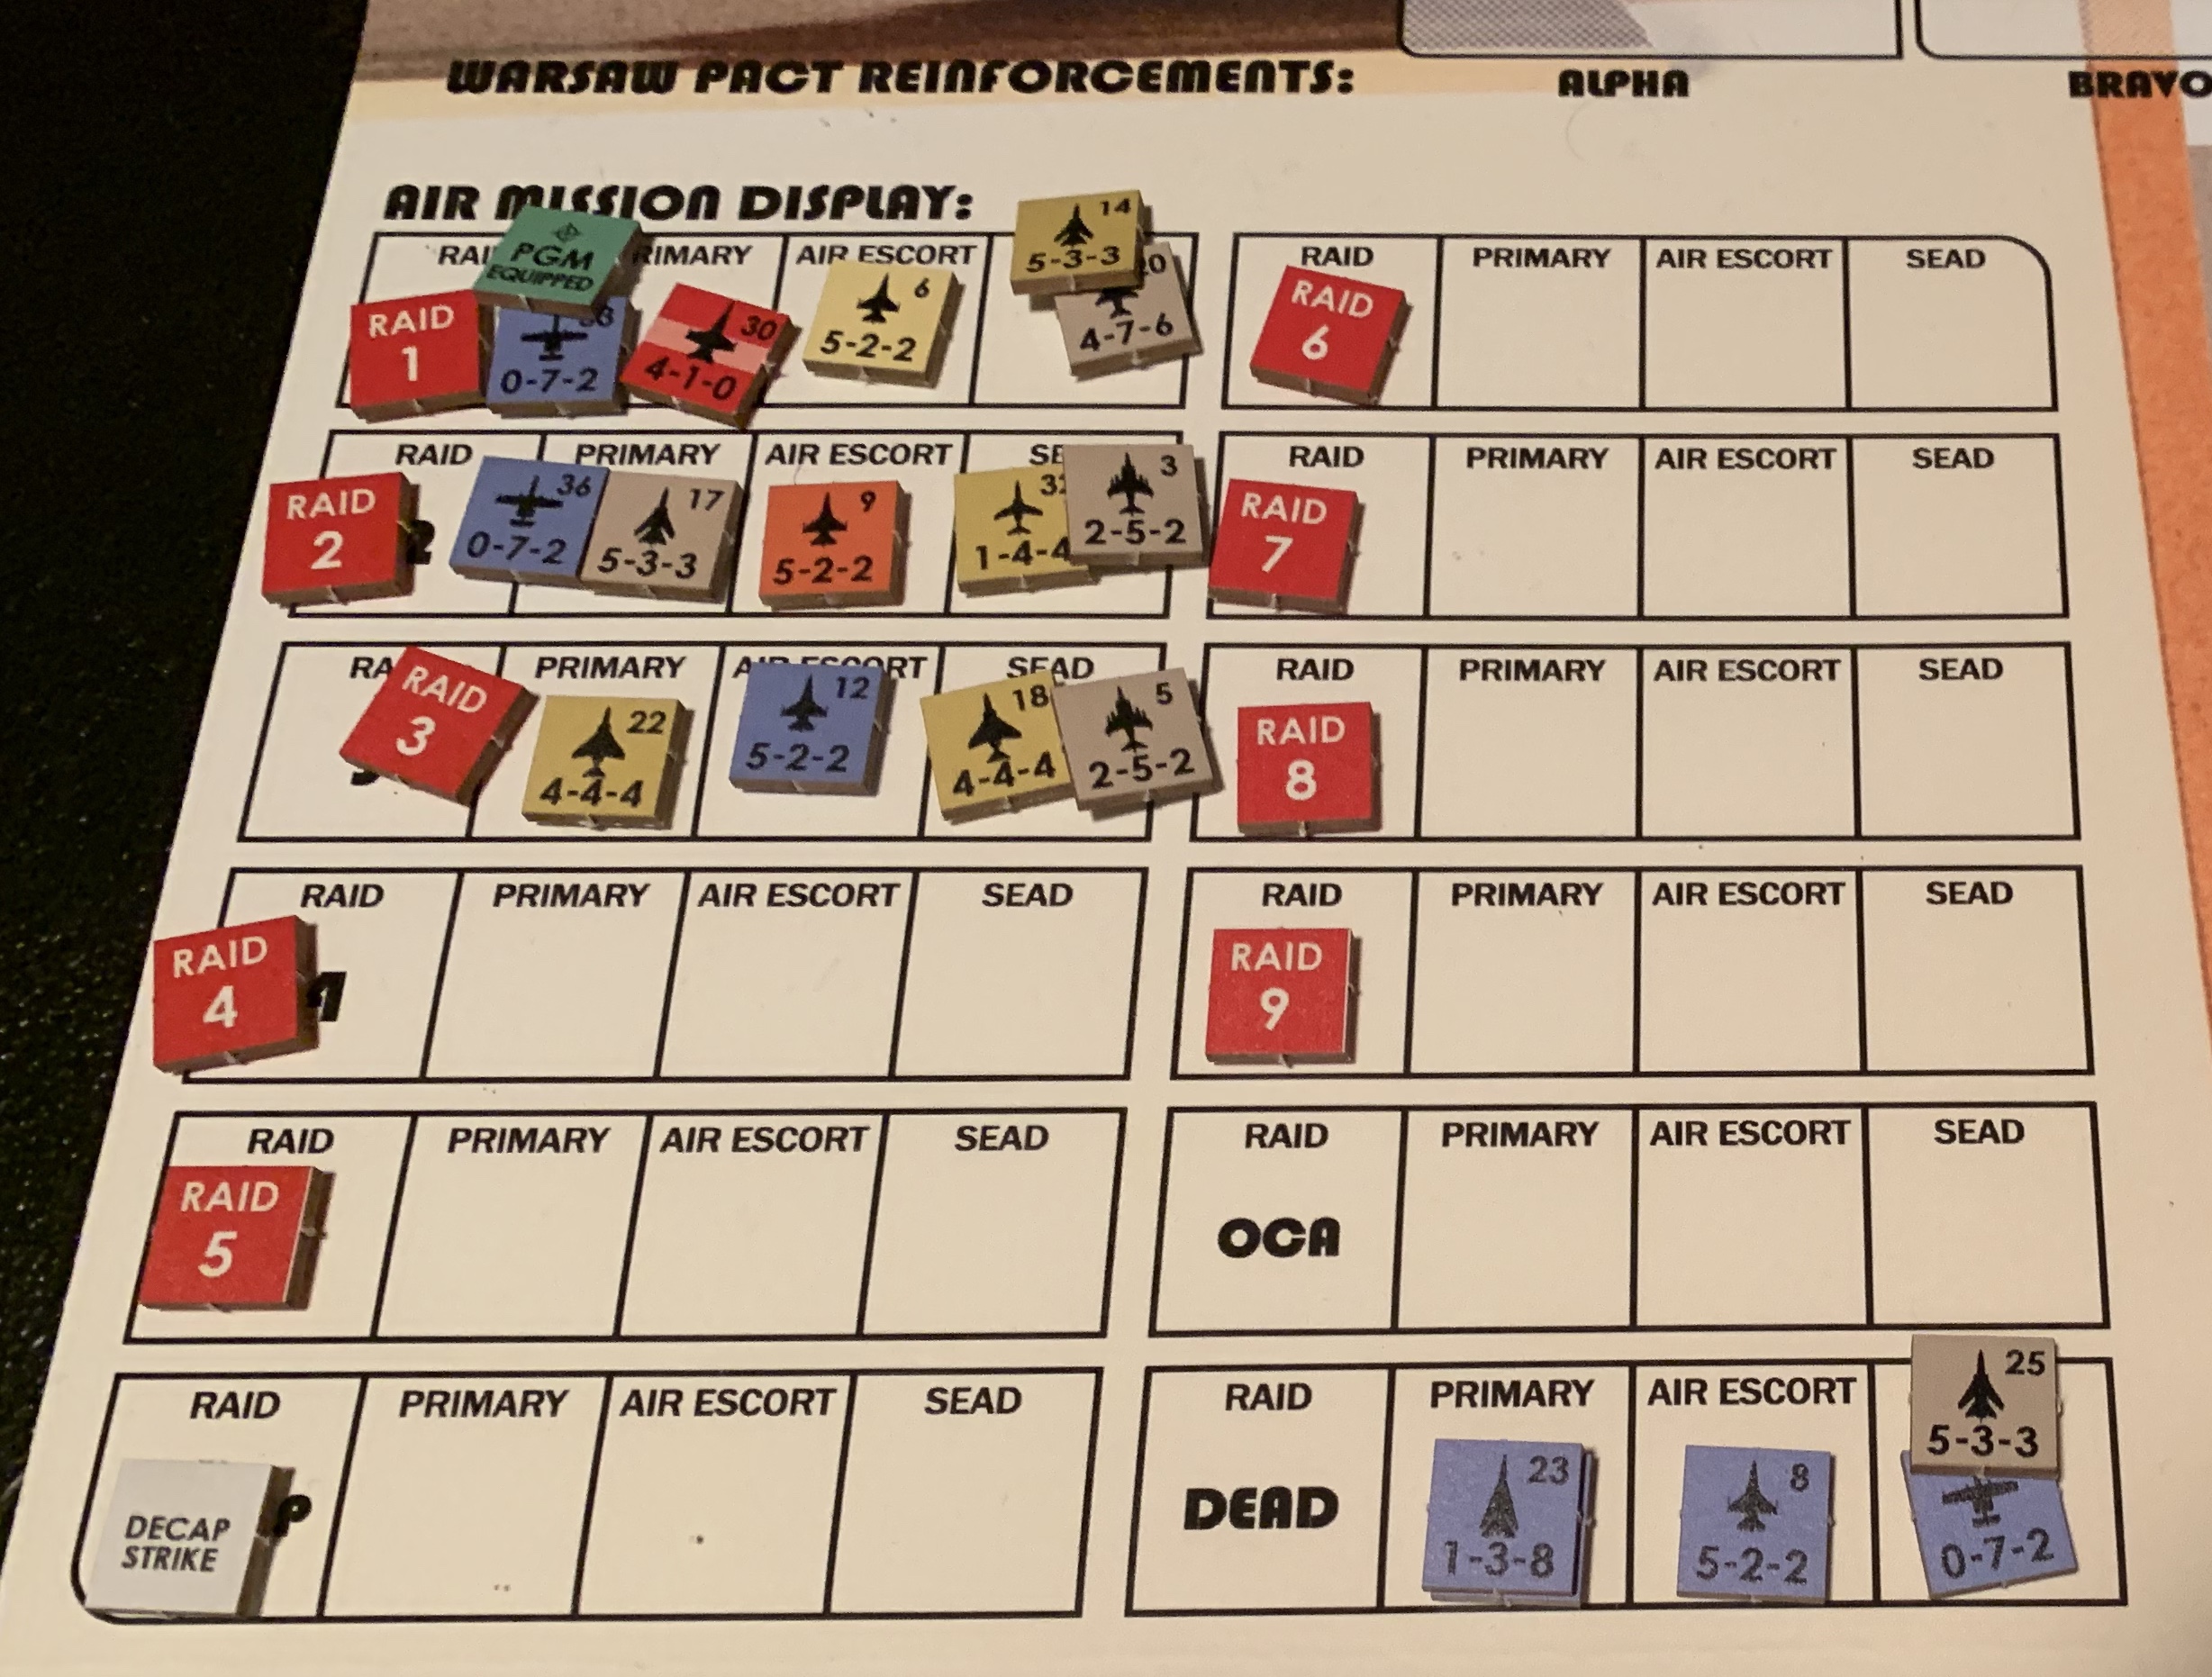
[I intended to get a picture of the board at this point, but I failed to do so. I was really excited about getting my Mars base built, and just kept pushing onwards. For reference, the current score is Competition: 8 profit, SpaceCorp: 2 profit. There is a Competition industrial base on Deimos, and SpaceCorp bases on Luna (Refinery) and Solar Lagrange Point 2 (SpacePort). Competition teams are on Luna, Lunar Lagrange Point 5, Deimos, North Mars, and South Mars. SpaceCorp’s infrastructure is Default Research 2, Default Move 1, Solid Nuclear Drive (Move 2, Explore 1), Survey Module (Explore 1 Build 1). No contracts have currently been fulfilled.]

Turns 11-15

The CNSA, not satisfied to let SpaceCorp claim Mars, explored Mars’s Northern Hemisphere, discovering Water. (+1 Profit). Meanwhile, Dynamic Synergistics began efforts to fulfill an infrastructure contract. (Cube to contract 6). SpaceCorp finally implemented its Salvage protocols (+1 Profit), and embarked on a Research, Development, and Acquisition campaign, acquiring a Heavy Lifter from the market and developing an new build module.

Dynamic Synergistics, continues its acquisition efforts, profiting by speculating on the market for surveying equipment. (Offers 3, 4, +1 Profit). The exisiting Survey Pod and Genome Accelerator on the market were replaced by a Solid Nuclear Drive and a Build Module. SpaceCorp quickly swooped in to acquire the build module, and through additional “market research” determined how to disrupt the operations of the competition. (Research, Take Build Module from Market, draw Intercept).

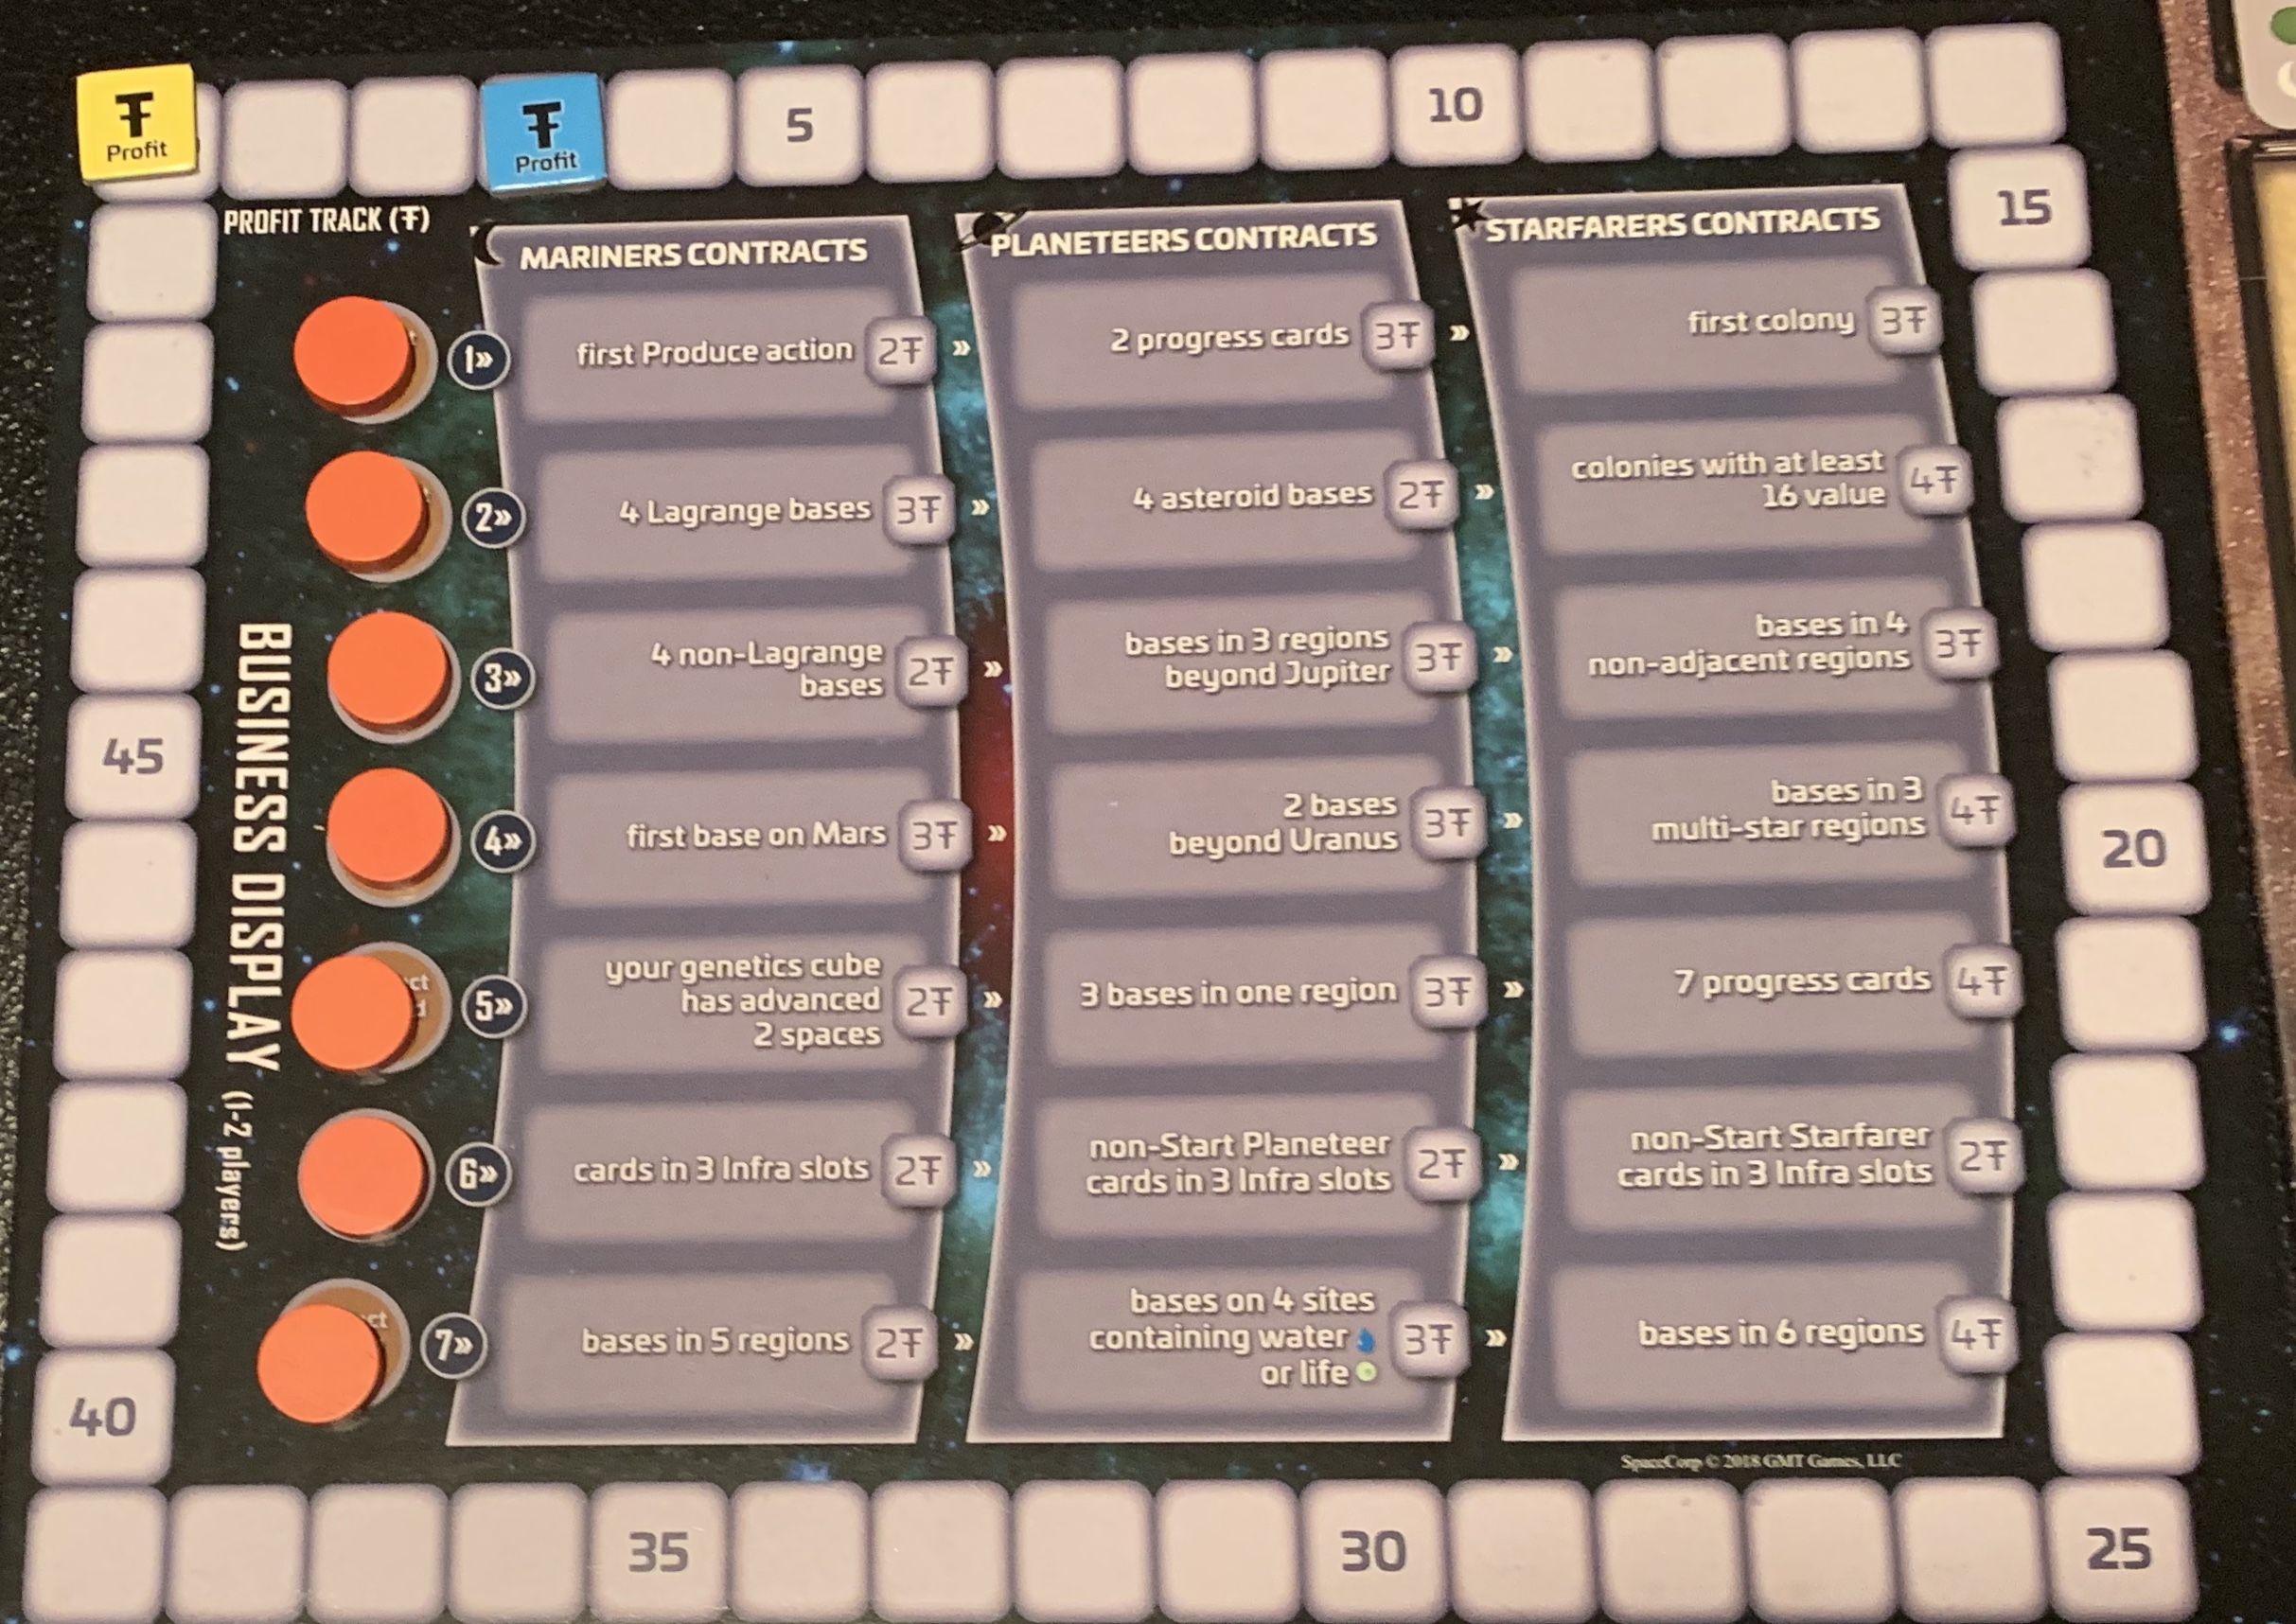
Dynamic Synergistics, having acquired a large percentage of the market’s production of space faring equipment, finally launched a successful mission, placing a team on Sisyphus, an asteroid in near earth orbit. SpaceCorp put Project Intercept into effect, allowing it to steal a march on its competition. (Play Intercept edge card, take an additional turn after this one). SpaceCorp began a massive construction effort, using a team of Heavy Lifters and Build Modules, building a refinery to take advantage of the Exotic Elements on South Mars. This construction fulfilled the first Mars Base contract. (+3 Profit). SpaceCorp R&D developed a new survey pod.

After the successful completion of the South Mars base, SpaceCorp began to produce Exotic Elements using Core Drillers. (+2 Profit). This fulfilled the first production contract. (+2 Profit; SpaceCorp now at 10 Profit, Competition at 9).

Dynamic Synergistics’ subsidiary, Synergistic Dynamics, started bulk purchasing survey equipment from the market. (Offers 1, 3, 4, +2 Profit). SpaceCorp continued its core drilling campaign, continuing to exploit Mars’s resources. (+2 Profit).

A new competitor, Strategic Space Survey and Mining (3S&M), announced its presence by launching a team to Lunar Lagrange Point 4, intending to build a Spaceport for launches in the near solar system. SpaceCorp focused on its infrastructure, adding Chemical Drives to help assist in transport of Exotic Elements. (Play Chemical Drive upgrade, fulfill contract +2 Profit).

[Deck exhausted, so there is one final turn for SpaceCorp.]

SpaceCorp, sensing that the next big thing in space exploration would be exploitation of resources beyond the Asteroid Belt, sent its South Mars team on an advance mission to the Asteroid Belt, identifying potential cites for bases. (Take First Beyond marker).

End of the Mariners Era

With the exploitation of the near solar system complete, SpaceCorp and its Competition turned their attention to the outer solar system. SpaceCorp’s lucrative South Mars refinery continued to produce valuable elements well into the new era. (Keep Exotic Artifacts and Refinery as legacy production).

Thanks to SpaceCorp’s asteroid belt team, SpaceCorp has already identified a suitable location for development. The asteroid Ceres turns out to be another substantial source of exotic elements, furthering SpaceCorp’s grip on the exotic element extraction industry. (Discover an E1 tile that has me draw an E2 tile. E2 tile is Exotic Elements, +2 Profit, P1).

SpaceCorp stands strong, preparing efforts to extend beyond the inner solar system.

The full spread of Planeteers.
Contract display at the beginning of Planeteers.
SpaceCorp player board and hand at the beginning of Planeteers.
The map at the beginning of Planeteers.

SpaceCorp: First Play (Part One)

John Butterfield’s SpaceCorp, published by GMT Games, covers the expansion of humanity into space between 2025 and 2300 AD. Specifically, SpaceCorp covers the expansion of commercial enterprise into space in three phases: Mariners, which covers exploration and development as far out as Mars; Planeteers, which covers the entire solar system; and Starfarers, in which you send missions to nearby star systems and establish interstellar colonies.

In the solitaire game, you play against a system representing the aggregated competition to your Corporation. To win, you must extract more profit from Space than your competition.

Each turn, the competition draws a card from its unique deck, which determines its actions.

After the competition acts, the player does the following, in order: (1) conduct one action, (2) claim any contract awards, (3) perform a free team transport, (4) discard played cards and replenish offers, and (5) draw a card if the player has four or fewer in hand. In addition to acting during their turn, the player may use certain edge abilities on cards during the competition’s turn.

Player actions include: researching or purchasing new technologies (drawing cards from the deck or available offers); moving teams from bases to other locations, exploring objects in space; building bases on Lagrange points, moons, or planets; producing goods from bases, doing genetics research, and upgrading infrastructure.

You can find a thoughtful review of the multiplayer game at Space-Biff!, and a review of the multiplayer rules and a full four-player play video via Heavy Cardboard on YouTube. Without further ado, I’ll get started.

Turns 1-5

The situation at the beginning of the game

Charles Foster Kane founded SpaceCorp, raising a series of investments from venture capitalists who believed that profits could be made by exploiting the resources of the inner solar system. SpaceCorp was not alone in its efforts to exploit the resources of outer space, however. SpaceCorp faced competition from national governments and corporate rivals, all of whom were rushing to claim the resources of space themselves.

The Competition struck first, as the People’s Republic of China’s China National Space Administration (CNSA) sent a team of explorers to Luna. SpaceCorp, in possession of only a few chemical rockets, embarked on a effort to acquire additional launch vehicles, ultimately obtaining two chemical engines from the European Space Agency, which was dismantling its rocket program. (Research 2, Pick 2 Chemical Engines from Offers). In addition, the SpaceCorp research and development team managed to build a science satellite that could explore other planets and moons. (Draw Science Module: Move 1, Explore 1). The ESA continued to divest itself of its technology, dumping two science modules on to the open market.

The Competition next went on a shopping spree, as a number of private companies pushed to begin launching satellites and construction teams. The companies purchased the two science modules and a cargo pod from the ESA. Because it was clear that the demand for space exploration technology was heating up, several companies sprang up to supply components to the major players in the space race. They supplied two chemical engines and a cargo pod to the market. SpaceCorp decided that it was too early to cede Luna to the Chinese, and so launched a team of its own to Luna using chemical engines and a cannibalized science module. (Move one team to Luna, Discard 2x Chemical Engines and 1 Science module for 3 move and use infrastructure for 1 move). Once the SpaceCorp explorers landed on the moon, the race was on to identify valuable deposits.

One of the new entrants into the space exploration market, Dynamic Synergistics, sent a construction team to Lunar Lagrange Point 5, likely looking to create a launch site for future missions. Meanwhile, SpaceCorp managed to steal a march on the PRC, exploring Luna and discovering Abundant Ores. (Discard Science Module). While the ores were not particularly valuable at present, they would substantially reduce the cost of constructing a base on Luna by allowing SpaceCorp to avoid costly launches of metals. (Discover E1 tile: -2 Base Cost, +0 Profit). SpaceCorp R&D constructed a Heavy Lifter, which would allow the transport of heavy building materials over long distances. (Draw Heavy Lifter: Move 2, Build 2).

Just while SpaceCorp was celebrating its victory over the Chinese for its lunar discoveries, news reached SpaceCorp of an ambitious CNSA launch to bring a team to Deimos, one of Mars’s moons. SpaceCorp responded by building a refinery on Luna, allowing it to exploit the local ores. (Build cost 0). R&D cooked up some dirty tricks, allowing SpaceCorp to piggyback off rivals satellite feeds. (Draw Poach: Research 2, Edge: Draw top two cards of discard pile after competition Offers action).

Dynamic Synergistics worked with a variety of government agencies, taking contracts for launches. (Offers 1, 2, 4. Remove 2x Chemical Drives, Cargo Pod, +3 Profit.) The market continued to boom, as startups, formed by former ESA and NASA engineers, created new products, including a Construction Rover (Build 2 Explore 2), a Solid Nuclear Drive (Move 2, Explore 1, Upgrade), and a Build Module (Build 1, Upgrade). SpaceCorp, not content to rest on its laurels in its moon base, launched a team from Luna to Solar Lagrange Point 2, planning to build a space port that could allow further exploration of Mars and its moons. SpaceCorp’s internal engineering teams created a Survey Module, which would allow both exploration and rudimentary building. (Explore 1, Build 1, Upgrade).

The Map after turn 5.
The Business Display after turn 5.
My player board and hand after turn 5.

Spirit Island: First Play (Part Three)

Start of Turn Seven

Turn Seven

Spirit Phase

River and Lightning spoke again as the storms met the flowing waters on Spirit Island. Looking at their growing power, the Spirits decided that it was time to take the offensive, striking fear in the hearts of the Invaders and destroying their precious cities. Both Lightning gathered its power while River expanded its reach. (River placed 2 presence on the northern coastal mountains).

Lightning first granted its boon to River, letting it strike quickly. Lightning then called upon the Purifying Flame to destroy the town in the northeastern wetlands region, causing fear among the Invaders. (+1 Fear, draw fear card). Next, Lightning Shattered Homesteads in the coastal mountain region to the south, causing even more fear. (+2 Fear). Lightning issued a Call to Bloodshed to the Dahan, who readied their spears for the Invaders. Finally, Lightning called Thundering Destruction down on the Invaders in northeastern wetlands region, eliminating the city there. (+2 fear).

River called upon the Flash Flood, damaging the city in the northern coastal mountains. River then used its power to Pull Beneath the Hungry Earth the city, eliminating it and causing additional fear. (+2 fear). River began to spread word among the Dahan of the River’s Bounty, encouraging them to move. Finally, River brought Massive Flooding to the northern coastal mountains, inundating and eliminating the town there. (+1 Fear).

Invader Phase

Fear of the Island’s Spirits was spreading among the Invaders. Emigration Accelerated as explorers fled the coastal lands. Invaders started to Avoid the Dahan, refusing to build where towns and cities did not outnumber Dahan villages.

The Invaders attempted to ravage the coastal regions of the island, but the fury of the storm and raging of the rivers, along with timely emigration by their explorers, left nothing for them to damage. One skirmish occured in the coastal jungles, where Dahan fell upon Invader explorers and eliminated them.

The Invaders next built in the desert, constructing towns in two of the four desert regions. In the other two, there was either no presence or the Invaders were outnumbered by the Dahan.

Finally, the Invaders explored the Mountains and Jungles of the Island, returning a number of explorers to the map.

Slow Powers

The River’s Bounty enticed two villages of Dahan to move from the southern coastal wetlands to the southern desert, home to the largest concentration of invaders, and the only remaining invader city.

Lightning’s Call to Bloodshed convinced the Dahan in the southern desert to storm the Invader city there. (+2 Fear. Draw Fear card. Terror Level 3). This was the last Invader City on the Island.

The Invaders had had enough of the Island, its angry Dahan, and its mysterious Spirits. The destruction of their final city was too much to bear, and the Metropole called for finding an easier place to colonize. The Island was purged from the maps of these Invaders, and for a time, the Dahan lived in peace. (Victory! No cities remaining at Terror Level 3).

Terror level three.
The map at the end of the game, devoid of Invader cities.

Impressions

I really enjoyed this quick game of Spirit Island, and my only disappointment was that the end came so suddenly. While I did not feel especially challenged, I was playing on the lowest possible difficulty in order to learn the game. I am confident that the next game will be harder, having looked over the effects of additional invaders, blight cards, and scenarios that I can incorporate.

The varying Spirits also seem like they will serve to keep the game fresh, as each Spirit has its own advantages and disadvantages. I am looking forward to getting this one to the table again.

Spirit Island: First Play (Part Two)

Beginning of Turn 4

Turn Four

Spirit Phase

Both Lightning and River found that it was necessary to meditate on the condition of the Island and their role in protecting the Dahan. They each reclaimed their power cards, gained an energy, and developed a new power.

Lightning would use the new power that it had gained, issuing a Call to Bloodshed to the Dahan in the coastal desert region. The Dahan, incensed, descended upon the Invaders’ town and drove them out, creating fear among the Imperialists. (+1 Fear). Lightning’s rage at the invasion of its domain was incandescent, and it called down lightning from the heavens to Shatter Homesteads in the adjoining desert, causing fear and driving out Invaders. (+2 Fear, draw fear card). Finally, Lightning called upon the Harbingers of Lightning to move against the Invaders. (Resolved in the slow powers phase).

River called upon its new powers as well, granting the southern desert Nature’s Resilience, enabling it to resist blight from the invaders. River granted Lightning the Boon of Vigor, sending three energy into its coffers. Finally, River called upon its domain to cleanse the blight through Uncanny Melting. (Resolved in the slow powers phase).

Invader Phase

The Invaders fear of the strange presences on the Island grew as their towns were destroyed. The Invaders blamed their explorers, who must be failing to identify a native threat. The Invader towns turned on their explorers, sending the lucky ones back to the Metropole, with the unlucky disappearing under mysterious circumstances. (Fear card triggers towns to eliminate one explorer in their space.

The invaders ravaged the desert, but did not manage to blight it. The focus on eradicating towns and creating resilience was able to protect the land from the invaders depredations. One invader explorer was eliminated when he attempted to infiltrate a Dahan village.

The invaders then built in the mountains, building a City in the northern coastal mountain regions and towns in the remaining regions.

The invaders explored the island’s wetlands, sending out explorers in to each wetland territory.

Slow Powers

Lightning commanded its Harbingers of Lightning to move from the northern forest to the adjacent mountain. The Dahan brought tales of the Lightning’s power with them, causing fear among the invaders. (+1 Fear). Storms raged over the island, bringing Thundering Destruction upon the invaders in the northeastern mountains, eliminating a town. (+1 Fear).

River called upon the ice in the mountains to melt, flowing down into and cleansing the northwestern wetlands. The invaders saw the Uncanny Melting as a sign that something more deadly may be in store for the future. (-1 Blight, +1 Fear).

Turn Five

Spirit Phase

Lightning’s success brought followers in the northwestern desert, who erected a sacred site in Lightnings honor. (+2 Presence). River found new followers in the northern coastal wetlands, and claimed a new power.

Lightning and River knew that the invaders in the northern coastal wetlands must be eliminated. Lightning called a Raging Storm to the region, eliminating two explorers and damaging the city there. Lightning followed up the storm with Delusions of Danger, striking fear into the invaders’ hearts. (+2 Fear). Finally, Lightning granted Lightning’s Boon on River, allowing River to strike with lightning speed.

River again called upon its domain to overflow the banks and Pull Beneath the Hungry Earth the city in the northern coastal wetlands. (+2 Fear). River called a Flash Flood into the southern coastal mountains, inundating the town their and eliminating it. (+1 Fear). Finally, River brought the River’s Bounty to the Dahan in the southern wetlands, enabling them to grow and multiply in the southwestern mountains. (+1 Dahan).

Invader Phase

The fear that the invaders felt enheartened the Dahan, causing them to gather and drive off explorers in the north eastern desert and the southern wetlands. (Terror Level 2, victory if all cities and towns are eliminated).

The invaders ravaged the mountains of the island, spreading blight in the northern mountain spaces, and reducing the Lightning’s connection with the land there. (-1 Presence). The southwestern mountains were also blighted, but the Dahan gathered their fought back, destroying the invading explorer and town. (+1 Fear).

The invaders built in the wetlands, constructing towns in the eastern wetlands on both halves of the island.

The invaders sent a new fleet of explorers from the Metropole, descending on the coastal lands. (All coastal lands +1 explorer).

Slow Powers

River, seeing the continued invasion of its domain, called on Massive Flooding in the southern coastal wetlands, destroying a town there and pushing the explorers there out into the desert. (+1 Fear).

Turn Six

Spirit Phase

Lightning and River again focused on their powers and their duties to protect the Dahan and the island. Both were energized, gained new powers, and refreshed their old powers.

Lightning again issued a Call to Bloodshed, and the Dahan in the northwestern coastal forest responded by driving out an invader town. (+1 Fear). Lightning continued to rage, Shattering Homesteads in the northern coastal mountains. (+2 Fear). Finally, Lightning issued a call to its Harbingers of Lightning, as they organized to move. (Resolved in slow powers phase).

River granted the Boon of Vigor on Lightning, providing additional energy. It also prepared to use a powerful new ability, Accelerate Rot, in the northern coastal wetlands. Finally, River prepared to cause Uncanny Melting. (Accelerate Rot and Uncanny Melting resolved in the slow powers phase).

Invader Phase

The invaders ravaged the wetlands, causing blight in the northern regions.

The invaders next built along the coasts, constructing towns in all coastal regions except the southern coastal wetlands, which were free of invader presence.

Finally, the invaders sent their explorers into the deserts.

Slow Powers

River caused Uncanny Melting in northern coastal wetlands, eliminating Blight and causing fear. (+1 Fear). River called Accelerated Rot down upon the coastal wetlands, eliminating a town and explorers there, and causing great fear among the invaders. (+3 Fear). Finally, River brought Massive Flooding upon the coastal desert region, surprising the unprepared invaders and eliminating a town, pushing explorers into the adjacent forest. (+1 Fear).

Lightning sent is Harbingers of Lightning to spread the word among the explorers in the western coastal forests. This caused some small amount of fear among the invaders. (+1 Fear). Finally, Lightning called Thundering Destruction down upon the western coastal forest town, destroying it. (+1 Fear).

Lightning, Turn Six.
River, Turn Six.
Fear Pool, Turn Six.
The Map, Turn Six.

Spirit Island: First Play (Part One)

You are powerful Spirits of the natural world, existing on an isolated island. Invaders from beyond the known sea have recently begun their colonization of your island, killing the native islanders—a people called the Dahan—and upsetting the natural balance. The Spirits of the island must grow in power and throw back the Invaders before the island is blighted beyond hope of recovery!

Spirit Island Rules, Page 3.

Spirit Island is a game by R. Eric Reid’s, published by Fabled Nexus, in which you play the Spirits of an isolated island, defending the island and its people from foreign colonizers.

Setup

I’ve decided to play this game with two of the more basic Spirits, Lightning’s Swift Strike and River Surges in Sunlight. Lightning’s Swift Strike begins with the ability to destroy invading towns, cause fear, and accelerate its own powers and that of other spirits.

River Surges in Sunlight is more powerful when its presence is in Wetlands, and can move pieces around the board, do damage in coastal regions, and create additional energy for the Spirits to use their power.

In the initial setup, the Invaders have built cities on the coasts on both maps. Towns were founded in the Forested region in the northeast, and in the Wetlands region in the southwest. During setup, the invaders explore Mountain spaces, which results in an explorer unit being placed in each of the Mountain hexes on the board. The Dahan population is concentrated outside of the territory occupied by the invaders, with the exception of a few villages in the newly explored mountain region, and a small village next to the City on the western coastal wetlands. Finally, my spirits have presence in the southwestern-most wetlands region (River Surges in Sunlight) and the eastern-most desert region (Lightning’s Swift Strike). Both of these are “sacred sites,” which makes them eligible to activate certain power cards.

Turn One

Spirit Phase

A storm was brewing above the island, and its two guardian spirits, Lightning and River, met when a bolt struck the wetlands. Lightning expanded its presence on the Island, building presence in the desert south of its sacred site. As a side effect, Lightning gained substantial energy. Lightning called on its powers, sending its Harbingers of the Lightning, two groups of devoted Dahan, from its sacred site to the Forest to the north, striking fear in the hearts of the invaders (+1 fear). Lightning also called down a Raging Storm in the eastern coastal mountains, which eliminated an explorer and damaged a city. These powers struck quickly due to Lightning’s ability to accelerate its strikes (when combined with air elements).

River expanded its presence as well, occupying the coastal wetlands to the east and spreading to the blighted forest to the north. River called on its powers as well. as Flash Floods washed away the damaged city on the east coast of the island (+2 fear). River also planned to gather the Dahan around the River’s Bounty, and force a town to move due to Massive Flooding. Those were slower powers however, and would have to wait.

Invader Phase:

The invaders were not content to simply explore the island, and quickly began constructing towns in the occupied mountain territories. Two towns sprung up in the northern mountains, and a third town was founded in the southwestern mountains. The invaders’ explorers continued to surge into the island, moving into all of the wetlands territories on the island.

Slow Powers:

The River’s Bounty called two villages of Dahan from the southwestern forests to the wetlands, where the Dahan were able to multiply giving thanks to River. (+1 Energy, +1 Dahan). River, enjoying the elements of sun and water it had called into being, was able to bring Massive Flooding to the western mountain range, pushing the invaders their to pick up stakes and move their town to the adjacent forest to the north. (Innate Power activation).

Turn Two

Spirit Phase

Lightning and River remained curious and concerned regarding the growth of the invaders in their lands. Lighting expanded its presence, incarnating a sacred site in the eastern portion of the mountain range on the northern edge of the island. Lightning then called upon the might of the heavens, sending bolts to Shatter Homesteads in the mountain region it had just occupied, causing fear and eliminating an invader town. (+2 fear). Lightning also granted Lightning’s Boon to River, allowing it to act as quick as Lightning itself.

River meditated on the harm that the invaders were bringing to the island. River’s meditation energized the spirit, and allowed it to think of new ways of looking at the problem. (+1 Energy, Refresh Cards, Gain Uncanny Melting power). River repaid its favor owed to Lightning by granting Lightning the Boon of Vigor, restoring Lightning’s energy. (+2 Energy to Lightning). River overflowed its banks in the southern wetlands, choosing to Wash Away the invaders’ explorer and town, driving them into the desert to the north. River then saw more Massive Flooding in the southeastern wetlands, driving the explorer there to the newly vacated wetlands to the west.

Invader Phase

The invading occupiers ravaged the land where they could. In the northeastern and southwestern mountains, the invaders found Dahan that resisted their ravages. (Explorers destroyed). In the northwestern mountains, however, the invaders managed to create blight. (9 remaining).

The invaders continued their building spree, this time building towns and cities in the wetlands. Only the coastal wetlands, where all invader presence had been pushed away, was free of the invaders’ buildings.

Finally, the invaders explored the desert regions of the island, placing an explorer in every piece of desert terrain.

Slow Powers

No slow powers this turn.

Turn Three

Spirit Phase

It was now Lightning’s turn to meditate on all that had happened with the invaders thus far. Lightning concluded that these invaders were sensitive to fear, and could be further made to fear through Delusions of Danger. (Reclaim Cards, +1 Energy, Gain power Delusions of Danger). Lightning saw the growth of towns and cities in the Wetlands adjacent to its desert sacred site, and was displeased. It struck with Shatter Homesteads, eliminating a town and causing fear. (+2 fear). Lightning then sent Delusions of Danger to the city there, causing terror among the invaders. (+2 fear, draw first fear card).

River expanded its presence on the map, incarnating a sacred site in the coastal forests on the northern half of the island. River then summoned its power to create a Flash Flood effecting the city in the coastal wetlands on the northern half of the island. (+1 fear). River also planned a number of slower effects. River would wash away the blight in the northern desert due to Uncanny Melting, which would have the benefit of frightening the explorer there. The River’s Bounty would further gather the Dahan in the southern wetlands, and then River would call on Massive Flooding thanks to the elements of sun and water that it had stockpiled.

Invader Phase

Fear struck the invaders as they saw that the spirits of the island were not simply the ignorant superstition of the Dahan. The invaders tread cautiously where they could feel the presence of the spirit as a result. (+2 Defend in spaces with Spirit Presence).

The invaders attempted to strike the peaceful Dahan in the southern wetlands, but found that River’s presence provided its own defense. The Dahan, incensed by the invaders violation of their sacred space, struck back, eliminating the explorer and town in the wetlands. (+1 fear). The invaders were able to cause more destruction on the northern part of the island, blighting both wetlands there and destroying a village of peaceful Dahan. (7 blight remaining).

The invaders built a mighty city in the Southern desert, and erected the beginnings of towns in the rest of the island’s deserts.

The invaders explorers continued to pour in, again exploring the island’s mountain territories.

Slow Powers

River’s Uncanny Melting cleared the blighted terrain in the northern desert, frightening the explorer standing watch over the desert. (+1 fear, 8 blight remaining). The River’s Bounty drew the Dahan from the ruins of the Invaders town in the southern wetlands to the coast, where the Dahan were able to multiply and give thanks to River. (+1 Energy, +1 Dahan). Finally, River expanded over its banks, causing a Massive Flood in the desert, eliminating an invader town. (+1 fear).

The map after three turns.
Lightning
River
Fear is building.

NATO Air Commander: First Play (Part Ten)

Turn Ten

Objectives

NATO intelligence suggested that the Soviet war economy was on the verge of collapse. Warsaw Pact troops had burned through stockpiled munitions, and they were not being replaced quickly enough to supply troops at the front. One last decisive push could bring the Soviets to the negotiating table.

SACEUR wanted a major push along all fronts, with the goal of liberating Frankfurt, Nuremberg, and Salzburg. This would require five successful close air support missions, including two close air support hits in Sector Foxtrot to free Salzburg. Kane believed his air force was up to the task.

Planning

OEW: As per standing NATO Air Doctrine, General Kane tasked two F-15 wings to provide air escort for NATO Offensive Electronic Warfare aircraft. Their role in suppressing enemy interception capabilities would prove vital to the airstrikes to come.

Raid 1, CAS Sector Foxtrot: In order to provide support for the Counterattack in Sector Foxtrot, Kane assigned a wing of Harriers and two wings of Tornados to strike duty, with support from a wing of F-16s and a wing of A-10s. (Air Escort 5, SEAD 7, Primary 10).

Raid 2, CAS Sector Echo: Air Command tasked a wing of Harriers for close air support in Sector Echo, again escorted by F-16s and A-10s. (Air Escort 5, SEAD 7, Primary 5).

Raid 3, CAS Sector Alpha: Air command again tasked a wing of Harriers for close air support in Sector Alpha, again escorted by F-16s and A-10s. (Air Escort 5, SEAD 7, Primary 5).

Raid 4, CAS Sector Delta: General Kane assigned a British Jaguar wing, equipped with the last of his stockpile of precision guided munitions to rain fire on the Soviet troops in Nuremberg. The Jaguar wing would have whatever additional firepower the CF-18s could provide, and would be escorted by a wing of Tornados, with a wing of F-111s and F-4Fs on SEAD duty. (Air Escort 5, SEAD 7, Primary 15).

Raid 5, CAS Sector Bravo: For political reasons, Kane ordered two close air support missions in Sector Bravo. The first included a wing of F-4Fs supported by Tornados for Air Escort and F-111s supported by F-4Fs on SEAD duty. (Air Escort 5, SEAD 7, Primary 4).

Raid 6, CAS Sector Bravo: The second strike against Sector Bravo would come from an unescorted F-117. (Primary 1).

Resolution

Once again, I will not list the numerical results for Raids 1-5, which succeed automatically thanks to the position of the OCA/OEW Track (6) and the DEAD Track (5). I will draw cards for each.

Raid 1, CAS Sector Foxtrot: NATO OCA and DEAD attacks had decimated Soviet defenses, allowing for all of the craft in Sector Foxtrot to get through. Two hits were inflicted, completing the West German II Corps objective.

Raid 2, CAS Sector Echo: Soviet air and ground defenses were strangely absent across the line as NATO aircraft were able to roam freely over Sector Echo. One hit.

Raid 3, CAS Sector Alpha: Sector Alpha had the same lack of effective Soviet defenses, resulting in one hit.

Raid 4, CAS Sector Delta: Sector Delta saw the last major resistance by the Soviets to NATO air attacks. The Soviets deployed substantial air and ground defenses, but the compromises forced on them by NATO OCA and DEAD attacks meant that the Soviets could not mass enough defenses to disrupt NATO missions. British Jaguars caused incredible damage to Warsaw Pact troops in Sector Delta. Three hits.

Raid 5, CAS Sector Bravo: Sector Bravo was also strangely empty of defenses, as Soviet troops and vehicles rushed towards the Rhine. One hit. This mission completed SACEUR’s Big Push objective.

Raid 6, CAS Sector Bravo: NATO’s F-117s went undetected, causing an additional hit in Sector Bravo.

Ground Combat

NATO forces managed to hold their own in Sectors Alpha, Delta, and Echo. Unfortunately, the small number of NATO troops on the Rhine were eliminated by a numerically superior Soviet force. Their delaying action, however, preserved Bonn under West German control, a vital city for the NATO allies to control if peace talks were to begin.

Counterattacks took place in Sectors Charlie, Delta, and Foxtrot, recovering Frankfurt, Nuremberg, and Salzburg from the Soviets.

Scoring and Recap

The Soviets, faced with a collapsing economy and rioting citizens at home, began preparations for a nuclear strike against the NATO allies. The Politburo, having fully sidelined any opposition, prepared to commit the Soviet Union to an irrevocable path of destruction. Luckily for the world, members of the Soviet high command, who could see the writing on the wall, decided to arrest and depose the Politburo. The Soviet leaders entered into peace talks with the NATO allies, agreeing to hold “free and fair elections, monitored by the United Nations” in the former Soviet Union, to reunite Germany, and to give up their Eastern European satellite states. NATO had achieved an overwhelming victory (3 Soviet VPs).

I enjoyed this play of NATO Air Commander, and am looking forward to playing it again, using one of the more challenging scenarios. While I was playing, I found myself frequently getting frustrated by the failures of NATO ground forces to capitalize on my air support efforts. At first, this really bothered me, but as I continued to think about it, I realized that this is likely exactly how the Commander of an Air Force is going to feel when supporting ground operations over which he has no control, while receiving orders from a theater commander who has to pay attention to more than just the status of NATO’s air force.

For the next game I play through, I’m going to try something a little different from the relatively austere (but lovely) war games I’ve been playing. Spirit Island is next.

NATO Air Commander: First Play (Part Nine)

Turn Nine

Objectives

SACEUR was not content to cede Bonn and Frankfurt to the Soviets, and asked Kane to plan a major air operation to allow NATO to retake one of the two major cities. Kane also received a request for substantial air support from Sector Alpha, which he ignored. All efforts would be poured into holding on to Stuttgart and fulfilling SACEUR’s request.

Planning

OEW: Per standing NATO Air Command Doctrine, Kane tasked two wings of F-15s to escort NATO OEW missions.

DECAP: A successful reconnaissance mission revealed the location of Warsaw Pact headquarters. Kane sent one of his F-111 wings to strike the HQ and remove it from play. Air Escort was provided by a wing of Tornados, with SEAD support from a wing of Tornados and F-4Fs. (Air Escort 5, SEAD 7, Primary 7).

Raid 1, CAS Sector Delta: Kane dispatched two Harrier wings, one equipped with precision guided munitions to help hold off the Soviets in Sector Delta. The mission was escorted by a wing of F-16s with SEAD provided by a wing of A-10s. (Air Escort 5, SEAD 7, Primary 15).

Raid 2, CAS Sector Delta: Kane dispatched a second CAS mission to Sector Delta, with the primary force consisting of one Harrier wing equipped with precision guided munitions. The Harriers were escorted by a wing of F-16s with SEAD provided by a wing of A-10s. (Air Escort 5, SEAD 7, Primary 10).

Raid 3, CAS Sector Echo: In Sector Echo, NATO deployed a wing of German Alphas for close air support, escorted by a wing of F-16s. SEAD was provided by a wing of A-10s. (Air Escort 5, SEAD 7, Primary 4).

Raid 4, CAS Sector Delta: In the third raid on Sector Delta, Kane deployed a mixed strike force of F-111s, F-4Fs, and Tornados. Escort was provided by a wing of F-16s, with SEAD provided by a wing of Jaguars. (Air Escort 5, SEAD 7, Primary 10).

Raid 5, CAS Sector Alpha: For his last raid, Kane sent a wing of F-117 stealth bombers to Sector Alpha without escort. (Primary 1).

Resolution

OEW: American F-15s were more than capable of providing escort to OEW craft. Many of the pilots expressed frustration that they were being called on for escort duty, rather than engaging in offensive operations against enemy fighters. The success of NATO OCA and OEW operations, however, made the use of F-15s in that role unnecessary. (1/7 successes).

[At current values all raids succeed automatically except Raid 5. I won’t give values for the automatic successes, although I have drawn cards.]

DECAP: F-111s struck deep behind enemy lines, destroying a Soviet HQ and severing communications. (Succeeds, removes a 10 Air Intercept/10 Ground Attack from the discard pile. 2/7 successes).

Raid 1, 2, and 4 CAS Sector Delta: NATO command called for multiple CAS raids in Sector Delta, hoping that the small number of troops occupying Stuttgart could hold out with a truly massive air support campaign. All three raids were successful, inflicting substantial damage on Soviet positions. (7 hits, 5/7 successes).

Raid 3, CAS Sector Echo: Kane sent a more limited set of strike craft to Sector Echo, hoping to provide just enough support for the NATO troops in Landshut to hold out against the Soviets. (1 hit. 6/7 successes).

Raid 5, CAS Sector Alpha: The F-117s manage to avoid both enemy early warning radar and detection from ground based anti-air, successfully bombing targets of opportunity in Sector Alpha. (1 hit. 7/7 successes).

General Kane succeeded in launching a Major Air Operation, but was unable to provide support for a counterattack by the West German I Corps in Sector Alpha. General Kane insisted that he could not help Sector Delta hold position and divert aircraft to Sector Alpha. The result is a net +1 RP and two retreats in one Sector of my choice.

Ground Combat

NATO troops in Alpha and Echo hold easily thanks to air support and the tactical competence of the soldiers stationed there.

The more substantial battle was in Sector Delta, where NATO troops were outnumbered and outclassed by the crack Soviet divisions pushing towards Stuttgart. NATO Air Command provided an enormous quantity of close air support to Sector Delta, annihilating Soviet armored vehicles, artillery, and infantry positions. The troops in Sector Delta, seeing the massive bombardment, were heartened and managed to hold on, fending off the Soviet attack. (1 cohesion +7 CAS +3 AR vs. 8).

Unfortunately, the troops in Sector Foxtrot, who were not provided with close air support, were unable to hold against the Soviet onslaught and were eliminated. (1 +2 AR vs. 8). The Soviets marched into Salzburg, completing their objectives in Sector Foxtrot. (Soviets to 9 VPs).

Major Air Operations allow crack NATO troops to retake Bonn and push Soviet troops past the Rhine (Soviets to 6 VPs). NATO troops at the Rhine will be fighting a delaying action, attempting to hold on until the Soviets collapse.

Reinforcements

The Soviets are once again able to restore all of their units to full Strength. NATO releases its remaining reserves, which allows NATO to reestablish a defensive perimeter on the Rhine. (Sector Bravo, Rhine +6, to 7).

NOTE: After I took this picture, I realized that next turn was in fact the last turn, and that the Soviet Army in Kassel could not reach Bonn as long as any strength army was in the Rhine River space. So instead of putting reinforcements in the Rhine space, I put them in Stuttgart, in hopes of holding against the army in Nuremberg. So there is now 1 cohesion in Rhine River, and 7 in Stuttgart.

Events, RPs, and Turn End

No event this round (Shuffle).

Kane receives the three RPs for major cities now that Bonn has been liberated, as well as 1 for the Soviet Units in Sector Alpha being at the starting line, and 1 net for objectives. Kane spends his RPs to obtain two additional sets of precision guided munitions.

Neither OCA nor DEAD track decay again, a stroke of luck for NATO.

Soviet VPs are currently at 6. If NATO can recapture Frankfurt and hold all of its cities, or lose only Landshut, NATO will obtain an overwhelming victory over the Soviets as their economy is no longer able to support their war effort. If NATO loses each of the remaining front line cities, it will still constitute a minor victory for NATO, based on NATO’s successful delaying action.

End of Turn Nine. Note that this photo also shows the Rhine River troops at 7 cohesion. It should be the Stuttgart troops in Sector Delta at 7 cohesion instead, with the Rhine River troops at 1.

NATO Air Commander: First Play (Part Eight)

Turn Eight

Objectives

NATO Command was in disarray after the German capture of Frankfurt and their flight from Bonn. The only request for support was in Sector Delta, where the outnumbered defenders of Stuttgart requested substantial close air support in order to spring a surprise counterattack against the Soviets. Kane was happy to oblige.

Planning

OEW: Per NATO doctrine, Kane tasked 2 wings of F-15s to escort NATO OEW aircraft.

DEAD: Soviet ground-based air defenses had been pushed to the breaking point by prior raids, so Kane ordered a final raid by two wings of F-111s to finish the destruction of Soviet air defenses. Kane tasked a wing of F-16s for air escort, and wings of Harriers and F-4F for SEAD support. (Air Escort 5, SEAD 9, Primary 15).

Raid 1, CAS Sector Bravo: The Soviets had pushed to the gates of Bonn, which required action from NATO leadership. Two British Harrier wings were tasked with supporting ground forces defending Bonn, with support from a wing of F-16s and SEAD from a wing of Jaguars. (Air Escort 5, SEAD 7, Primary 10).

Raid 2, CAS Sector Delta: A wing of A-10s with precision guided munitions, as well as a wing of Tornados and German Alphas in CAS configuration were tasked with providing the substantial air support required by the US VII Corps for their counter attack. An additional wing of A-10s was tasked to SEAD, and F-16s would provide fighter escort. (Air Escort 5, SEAD 7, Primary 21).

Raid 3, CAS Sector Alpha: Air Command tasked a wing of A10s and a wing of Tornados as close air support for Sector Alpha, the northern front, with air escort provided by a wing of F-16s and SEAD support from a wing of F-4Fs and a wing of Tornados. (Air Escort 5, SEAD 7, Primary 10).

Raid 4, CAS Sector Echo: Finally, Kane ordered his F-117 Stealth Fighter wing to provide CAS in Sector Echo without escort. (Primary: 1).

Resolution

DEAD: NATO’s F-111s proved their worth again in their strikes on Soviet air defenses. The Aardvarks were able to target and destroy Soviet SAM sites and air defense radars, rending large swaths of Soviet ground defenses ineffective. (Air Escort 5 vs. Air Intercept 0, SEAD 9 vs. Ground Defense 5 -2 DEAD. 3 hits, DEAD track to 5).

Raid 1, CAS Sector Bravo: CAS aircraft in Sector Bravo found the Sector eerily quiet, as Soviet intercept radar did not detect the raid, and ground defenses were no operational. (Air Escort 5 vs. Air Intercept 1 -6 OCA, SEAD 7 vs. Ground Defense 4 -5 DEAD. 2 hits).

Raid 2, CAS Sector Delta: The large raid in Sector Delta likewise found limited resistance by the Soviets. The few ground defenses that could have troubled the strike wings were easily dealt with by the A-10s tasked for SEAD support. The A-10s precision strikes on enemy troop concentrations would also enable counterattacks by United States units positioned in the sector. (Air Escort 5 vs. Air Intercept 6 -6 OCA, SEAD 7 vs. Ground Defense 7 -5 DEAD. 4 hits. Objective accomplished).

Raid 3, CAS Sector Alpha: The raid defending Hamburg encountered light anti-air resistance, which was easily handled by NATO F-16s. The A-10 and Tornado wings were able to inflict substantial damage on Soviet positions outside of Hamburg, guaranteeing that the NATO forces there would be able to hold. (Air Escort 5 vs. Air Intercept 8 -6 OCA, SEAD 7 vs. Ground Defense 3 -5 DEAD. 2 hits).

Raid 4, CAS Sector Echo: The Stealth Fighters in Sector Echo lived up to their name, avoiding detection and damaging Soviet units in Regensburg. (1 hit).

Because Kane accomplished his objective in Sector Delta, he would have access to additional resources (and enable a counterattack in the Sector).

Ground Combat

Soviet forces maneuvered brilliantly against NATO defenders. A daring night attack on Bonn managed to catch NATO forces unprepared, driving them out of Bonn and capturing the city. The defenders in Stuttgart in Sector Delta were destroyed despite the investment of NATO air power. While NATO was able to counterattack and puch Soviet forces back, Stuttgart was left with little in the way of effective defense. Soviets also advanced through the weakened forces outside of Linz, threatening Salzburg.

Sectors Alpha and Echo managed to hold, preventing a complete disaster for NATO forces.

Reinforcements

The Soviets took few losses from their attacks, and were easily able to reinforce all of their units to full strength. NATO, on the other hand, continued to suffer attrition, able to muster only 1 cohesion point of reinforcements, which went to Hamburg (to 8). It looked likely that Salzburg and Stuttgart would fall to the Soviets in short order.

Looking pretty dire for West Germany.

Events, RPs, and Turn End

NATO attacks on Soviet air defenses took their toll, and enabled a strategic (conventional) strike deep into Soviet territory. While symbolic, the strike on Moscow was a public relations coup for NATO. (Event gives +1 VP due to DEAD track position).

Kane received 6 RPs this turn (3 mission, 2 cities, 1 Soviet unit at start position). He spent them on two sets of precision guided munitions.

DEAD and OCA track remain where they are. Soviet VPs at 8.

NATO Air Commander: First Play (Part Seven)

Turn Seven

Objectives

The Bundeswehr was finally ready to come into its own. Both West German Corps, in Alpha and Foxtrot Sectors, were looking to fight back against the East German and Soviet troops streaming over the border. Air support would be needed, and General Kane was confident that it could be provided.

Planning

OEW: As had become standard practice at NATO air command, General Kane tasked his two wings of F-15s to provide air escort for Offensive Electronic Warfare operations, working to suppress Soviet air defenses.

DEAD: Now that Soviet air operations had been substantially curtailed, Kane tasked his wings of F-111s to strike Soviet ground-based air defenses. They would be escorted by a wing of F-16s, with A-10s and Tornados providing SEAD support. (Air Escort 5, SEAD 10, Primary 15)

Raid 1, CAS Alpha Sector: In order to fulfill the West German I Corps request for close air support, tasking a wing of A-10s equipped with precision guided munitions and a reduced wing of CF-18 to strike at Soviet formations. Air Escort would be provided by a wing of F-16s, and SEAD would be provided by a wing of Jaguars and a wing of Tornados. (Air Escort 5, SEAD 10, Primary 15).

Raid 2, CAS Foxtrot Sector: The West German II Corps requested relatively limited air support, which could be provided by a wing of A-10s and a wing of Tornados. Once again, a wing of NATO F-16s were tasked to air escort, with SEAD support provided by a Harrier wing and Alpha wing. (Air Escort 5, SEAD 9, Primary 10).

Raid 3, CAS Delta Sector: Kane launched a third raid in Sector Delta, hoping to support Nuremberg against a substantial Soviet concentration. Kane tasked a wing of F-4Fs to provide close air support, with escorts from a wing of F-16s, and wings of Harriers and F-4Fs assigned to provide SEAD. (Air Escort 5, SEAD 9, Primary 4).

Resolution

OEW: As usual, NATO F-15s are more than adequate to provide escort to Offensive Electronic Warfare aircraft. (OCA/OEW to 6).

DEAD: While NATO forces encountered little resistance from Soviet air forces, NATO attacks on Soviet ground defenses faced substantial resistance from the targeted SAM sites. The Tornados and Jaguars tasked to SEAD were up to the task however, and allowed the F-111s to pierce enemy air defenses and destroy them. (Air Escort 5 vs. 1 -6 OCA, SEAD 10 vs. Ground Defense 10 -1 DEAD. 3 hits, DEAD to 2.)

Raid 1, CAS Alpha Sector: NATO’s CAS raid in Sector Alpha saw a similar lack of Soviet air power and a surfeit of Soviet ground defenses. Thanks to NATO’s successful DEAD actions, SEAD air craft were able to suppress enemy air defenses, allowing NATO A-10s a clear attack run on a Soviet Column, inflicting substantial damage. (Air Escort 5 vs. Air Intercept 2 -6 OCA, SEAD 10 vs. Ground Defense 10 -2 DEAD. 3 hits). This raid was sufficient to enable a counterattack by the West German I Corps, accomplishing Kane’s first objective for the turn.

Raid 2, CAS Foxtrot Sector: NATO’s efforts to support Sector Foxtrot faced substantial Soviet opposition, both in the air and on the ground. Luckily, NATO OCA and DEAD efforts ensured that the mission could succeed with reasonable economy of force. West Germany’s II Corps was able to launch its counterattack thanks to the volume of CAS support received. (Air Escort 5 vs. Air Intercept 10 -6 OCA, SEAD 9 vs. Ground Defense 10 -2 DEAD. 2 hits.)

Raid 3, CAS Delta Sector: The limited raid in Sector Delta was a success, although it again faced substantial ground opposition. NATO Harriers and F-4Fs provided strong SEAD support, allowing the a wing of F-4Fs to provide combat support to NATO troops. (Air Escort 5 vs. Air Intercept 1 -6 OCA, SEAD 9 vs. Ground Defense 10 -2 DEAD. 1 hit.)

Because General Kane was able to accomplish both objectives, he would receive substantial resources from NATO. In addition, NATO troops would counterattack in Sectors Alpha and Foxtrot.

Ground Combat

The Soviets deployed a reserve of Mi-24 Hind attack helicopters, cleverly hidden from NATO forces. The overwhelming deployment blunted NATO counterattacks and pushed NATO forces back across the front. Sectors Alpha and Echo were able to hold on, heroic against enemy pressure.

Sector Bravo saw the Soviet Armies capture the Rhine, approaching the outskirts of Bonn. The Bundestag and German high command evacuated the city. Meanwhile, in Sector Charlie, the Soviets eliminated the defenders of Frankfurt, capturing the strategically important financial center of Germany. In Sector Delta, the Soviets seized Nuremberg and threatened Stuttgart. In Sector Foxtrot, a heroic NATO defense was beaten back, as the Soviets advanced to the outskirts of Salzburg.

All told, NATO lost 28 cohesion points worth of troops as the Soviets seized 4 additional victory points, including a critical resource space.

NATO was able to counterattack in Alpha and Foxtrot Sectors, bleeding off some Soviet units in Alpha Sector and pushing the Soviets back to Linz in Foxtrot Sector. Despite these victories, mood at NATO high command was glum.

Reinforcements

The Soviets continued to pour men and material into battle, increasing all of their units to full strength. NATO, on the other hand, was suffering the effects of attrition, and was only able to muster 4 cohesion points worth of reinforcements, all of which were placed to defend Bonn in Bravo Sector (to 6).

Disaster on the Rhine.

Events, RPs, and Turn End

All things were normal on the front, with no surprising events occurring. The Soviet capture of Frankfurt was evidently enough.

Kane received a full complement of resources thanks to meeting his objectives, even if the Soviets had managed to take Frankfurt. (1 +5 objectives, +3 cities, +1 Soviet army at start location). Kane used his resources to repair his damaged Stealth Fighters and Harriers, making them ready to defend Bonn against Soviet aggression. He also manged to procure some of the limited supply of remaining NATO precision guided munitions.

In seemingly the only positive for NATO this turn, neither the OCA nor the DEAD track recovered.

NATO Air Commander: First Play (Part Six)

Turn Six

Objectives

SACEUR again asked NATO Air Command to conduct a broad air offensive, including a variety of strikes along multiple fronts. While possible, this would stretch NATO air forces to their limit, requiring acceptance of risk of loss of pilots, aircraft, and weapons systems.

At the same time, the West German II Corps, under Commander CENTAG, developed plans for a counterattack outside of Munich in Sector Echo. It would require a moderate amount of support from NATO air elements, which General Kane judged to be feasible within SACEUR’s larger air offensive.

Planning

In order to satisfy SACEUR, Kane needed to plan seven successful raids. In order to meet this target, Kane planned to continue OEW efforts against the Soviets, reducing their air capacity, to undertake Destruction of Enemy Air Defenses (DEAD) strikes against Soviet Positions, and launch 5 close air support raids, striking targets across the front, including a strike on Sectors Alpha through Echo. Sector Foxtrot was provided with additional weaponry from NATO command, and so was left on its own.

OEW: Kane again tasked two wings of F-15s to escort NATO OEW efforts, in order to suppress Soviet/Warsaw Pact air capabilities.

DEAD: Having sufficiently reduced Soviet air capabilities with Offensive Counter Air strikes and OEW missions, Kane’s forces turned towards the Destruction of Enemy Air Defenses. Kane tasked two F-111s to strike enemy ground defenses, with air escort provided by a wing of F-16s and SEAD provided by wings of Jaguars and Tornados. (Air Escort 5, Ground Attack 10, Primary (Strike) 15).

Raid 1, CAS Sector Alpha: Kane tasked a wing of A-10s and a wing of Tornados to Sector Alpha, supporting the defense of Hamburg and Bremen. Air Escort would be provided by a wing of F-16s, with SEAD support provided by Harriers equipped with AGM-88 anti-radiation missiles. (Air Escort 5, Ground Attack 10, Primary (Ground Attack) 10)

Raid 2, CAS Sector Beta: Kane tasked the newly repaired wing of West German Alphas to support NATO forces on the Rhine. Once again, Air Escort would be provided by a wing of F-16s, with accompanying SEAD support by two wings of F-4Fs. (Air Escort 5, Ground Attack 8, Primary (Ground Attack) 4)

Raid 3, CAS Sector Charlie: Kane tasked a wing of F-117 stealth fighters to provide close air support for the NATO units outside of Frankfurt. (Primary (Ground Attack) 1).

Raid 4, CAS Sector Delta: In order to defend Nuremberg, Stuttgart, and Strasbourg, all along the line of advance for Soviet units in Sector Delta, Kane tasked a wing of Harriers equipped with precision guided air to ground weapons to strike Soviet positions. Air Escort was provided by a wing of Tornados, with A-10s accompanying for SEAD support. (Air Escort 5, Ground Attack 7, Primary (Ground Attack) 10).

Raid 5, CAS Sector Echo: In order to support the planned counterattack in Sector Echo, Kane tasked another wing of Harriers equipped with precision guided munitions to provide CAS. Air Escort will be provided by a wing of F-16s with SEAD support including a wing of A-10s and a reduced wing of CF-18s. (Air Escort 5, Ground Attack 8, Primary (Ground Attack) 10).

Resolution

NATO OEW efforts continued, reducing the ability of Soviet air forces to respond effectively.

DEAD: NATO F-111s delivered precision strikes to Warsaw Pact air defenses. The strike managed to evade Soviet air radar and controls, and the Jaguars and Tornados were able to provide effective suppression of air defenses, creating an opportunity for destruction of many Warsaw Pact anti-air assets. (Air Escort 5 vs. Air Intercept 4 -6 OCA, SEAD 10 vs. Ground Defense 6. 3 Hits, DEAD table to 1).

Raid 1, CAS Sector Alpha: The NATO raid into Sector Alpha was not intercepted by the Soviets, but encountered substantial ground opposition. Cutting edge AGM-88 anti-radiation missiles, fired from specially modified British Harriers, cleared the way for A-10s and Tornados to destroy a variety of Soviet armored vehicles. (Air Escort 5 vs. Air Intercept 1 -6 OCA, SEAD 10 vs. Ground Defense 9 -1 DEAD, 2 Hits.)

Raid 2, CAS Sector Bravo: Sector Bravo turned out to be entirely undefended. Thanks to NATO OCA and DEAD efforts, there were no available interceptors or ground defenses. West German Alphas were able to deliver effective bombing strikes against Soviet forces. (Air Intercept 6 -6 OCA, Ground Defense 1 -1 DEAD. 1 hit).

Raid 3, CAS Sector Charlie: General Kane once again learned the hard lesson that F-117s, for all their Stealth capabilities, make terrible close support aircraft. The newly constructed wing of F-117s was decimated by Soviet ground-based air defenses. (Ground Defense 10 results in mission failure, F-117 eliminated).

Raid 4, CAS Sector Delta: The Soviets responded to NATO raids and DEAD strikes by shifting substantial resources to Sector Delta. Although there were no available aircraft, the sheer volume of fire from Soviet SAM sites was sufficient to abort the operation, causing substantial damage to a wing of Harriers. (Air Escort 5 vs. Air Intercept 0 -6 OCA, Shuffle. SEAD 7 vs. Ground Defense 10 -1 DEAD. Abort, Harrier damaged, PGM discarded).

Raid 5, CAS Sector Echo: After two failures, there was much concern at NATO headquarters over the Sector Echo raid. A loss here would be very harmful to NATO’s goals, and would make the West German II Corps counterattack impossible. While the Soviets were able to intercept the raid and had substantial ground cover, NATO air escort and SEAD forces were able to protect the Harriers that were to deliver the primary strikes. The mission was a success, enabling an effective counterattack by the West German II Corps. (Air Escort 5 vs. Air Intercept 8 -6 OCA. SEAD 8 vs. Ground Defense 7 -1 DEAD, 2 hits).

Kane was unable to deliver a major air attack that satisfied SACEUR, but took some consolation in the fact that he was able to support the counterattack in Sector Echo. (Net +0 RP. Retreat in Sector Echo).

Ground Attack

NATO was able to successfully defend in Alpha (7 +2 Attack Resolution (AR) +2 CAS vs. 8), Bravo (8 +1 CAS vs. 8), Echo (8 +2 AR +2 CAS vs. 8), and Foxtrot (4 +2 AR(x 2 for event purposes) vs. 6).

NATO suffered catastrophic losses in Sector Charlie. The failure of General Kane’s F-117s to provide effective close air support resulted in the destruction of a fully armed and equipped NATO force, risking capture of Frankfurt. NATO also suffered a defeat in Sector Delta, where the Soviets now threaten Nuremburg.

A counterattack by the West German II Corps, defending Munich, was able to push Soviet forces out of Landshut.

While NATO suffered heavy losses (12 cohesion points), it managed to actually regain 1 VP (by retaking Linz).

Reinforcements

All Soviet forces except Foxtrot brought to full strength. Foxtrot brought to near full strength (cohesion 7).

NATO, to its credit, poured in additional reinforcements. 7 Cohesion to Frankfurt, Sector Charlie for a final defense. 1 Cohesion to Nuremberg, Sector Delta (to 4). Biggest gaps were at Nuremberg (Sector Delta) and outside Linz (Sector Echo) (4 vs. 8 and 4 vs. 7, respectively).

Events, RPs, and Turn End

The Soviet Union deployed Mi-24 Hind helicopters en masse in an effort to blunt NATO counterattacks. (-1 to AR next turn).

Kane’s failure to kick off a major campaign for SACEUR resulted in no resources beyond those from key cities and effective fronts. (+6 RPs). General Kane again called on the United States Aerospace industry to produce additional F-117s, and acquired a small stock of precision guided munition. (Spend 2 to move F-117s to damaged box. Spend 3 for PGMs. Hold 1).

Kane also requested repairs on the damaged British Harriers, which would be out of the line for the next set of raids. The Soviets were once again unable to improve their interception capabilities, and found themselves having difficulty replacing destroyed air defenses. (No change to OCA and DEAD tracks).